1.0 What Is A Calendar? #
The Calendar is a scheduling tool used to manage and organize bookings, appointments, or reservations on specific dates and times. It allows customers to view available time slots, make reservations, and helps businesses efficiently manage their schedules.
To activate the Reservation feature, you must first create and configure your calendar.
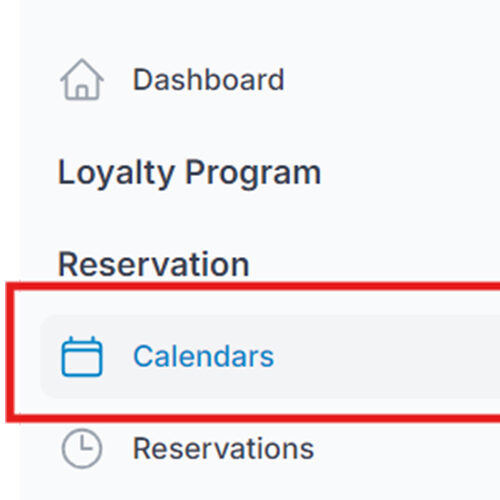
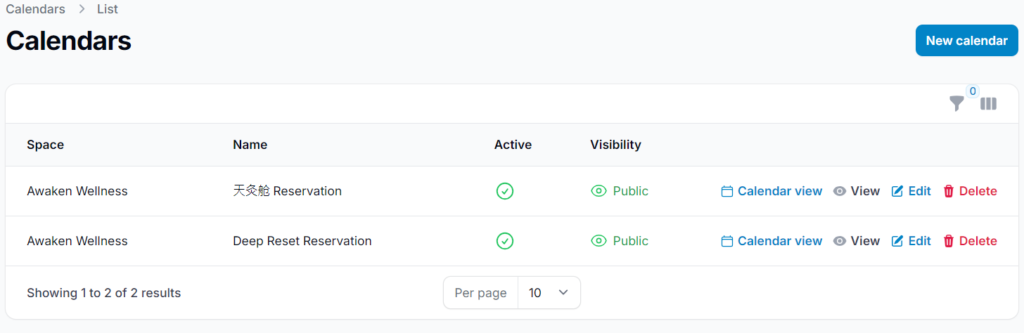
Step 1: Access the Calendars Section #
From the dashboard, click on “Calendars” to begin creating your reservation calendar.
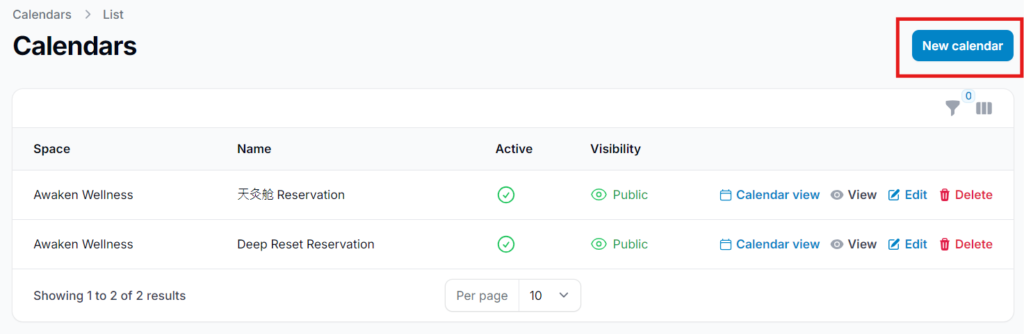
Step 2: Create a New Calendar #
Click on “New Calendar” located at the top right corner of the page to initiate the setup process.
Step 3: Enter Calendar Details #
Provide the required basic information for your calendar, such as the calendar name, description, and any relevant settings.
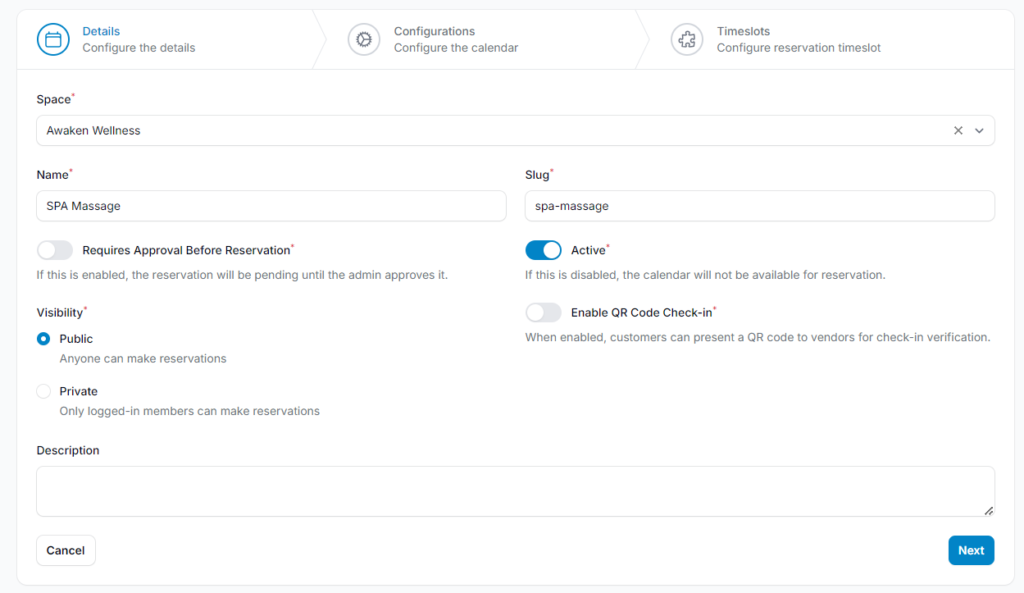
2.0 Calendar Field Definitions #
- Space: Refers to the designated area or location that the calendar is associated with.
- Name: The title of the calendar used for identification and display purposes.
- Slug: A simplified, URL-friendly identifier that will be automatically generated to form the calendar’s unique web address.
- Description: A brief summary explaining the purpose or use of the calendar.
- Visibility: Determines who can view and access the calendar. You can set this to public (visible to all) or private (restricted to specific users).
After completing all required fields, toggle the “Active” button to enable the calendar for customer reservations. This ensures the calendar is live and available for use.
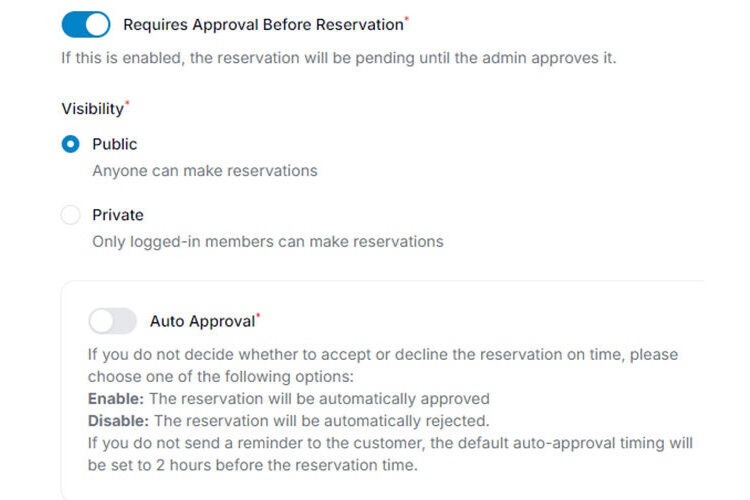
You may enable the “Requires Approval Before Reservation” option if you prefer to manually review and approve each booking request before it is confirmed.
Alternatively, activate the “Auto Approval” option to automatically confirm reservations without requiring manual approval, streamlining the booking process.
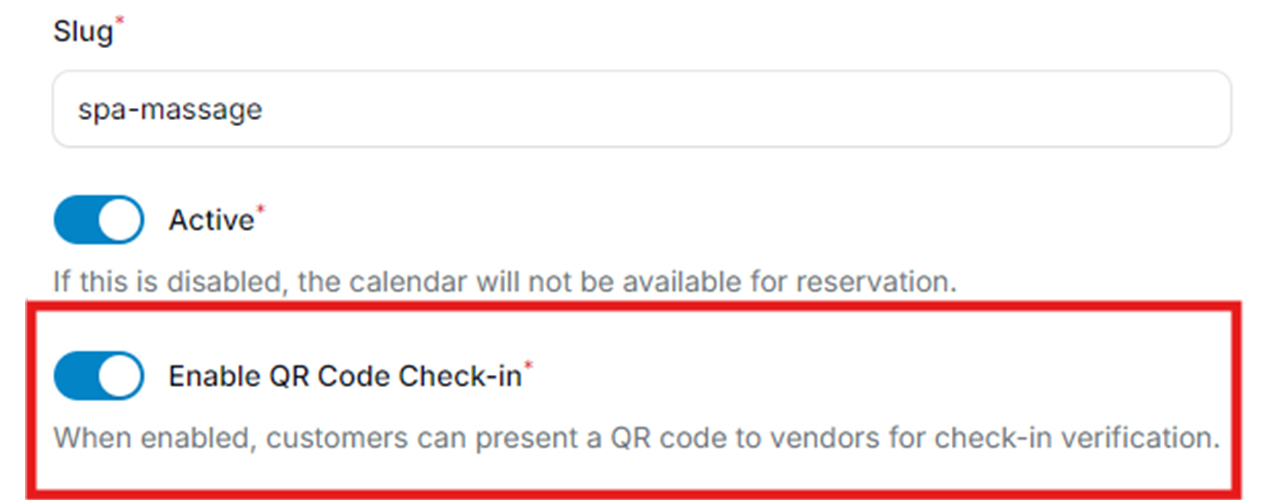
For added security, you may enable the “QR Code Check-in” feature. Once a customer completes their reservation, they will receive a unique QR code, which can be used to verify their booking upon arrival.
Step 4: Configure the Calendar Settings #
Adjust the calendar settings as needed, including terms and conditions, capacity limits, reminder notifications, and other preferences to suit your business requirements.
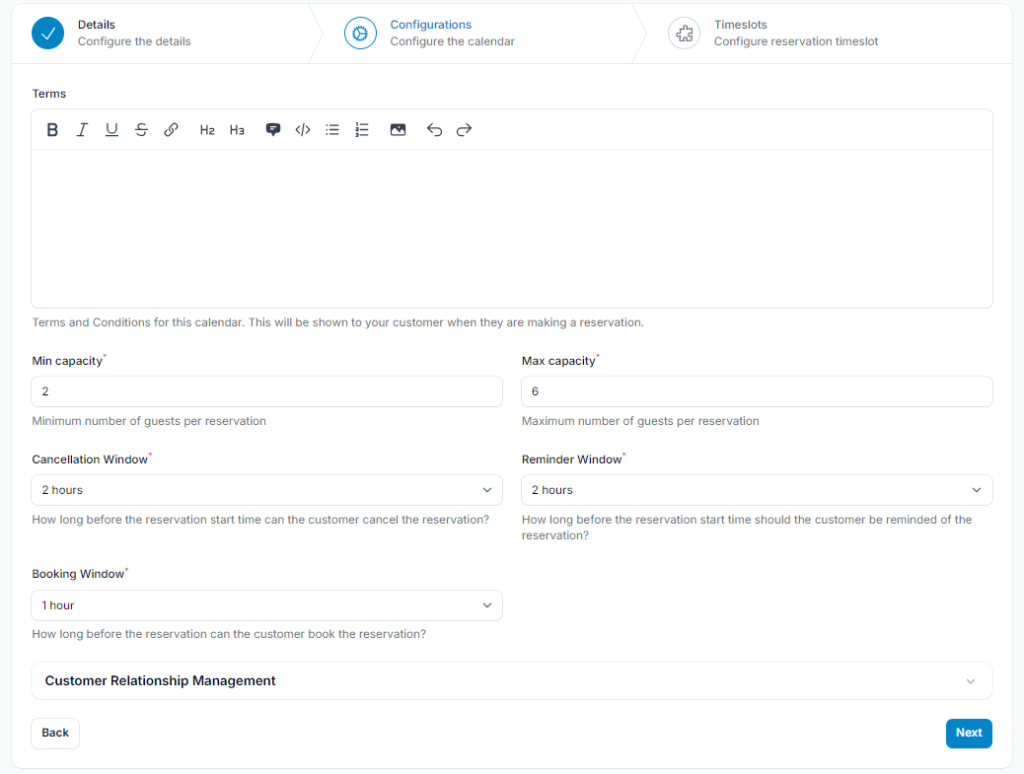
3.0 Calendar Configuration Field Definitions #
- Terms: Enter your reservation policies here. These terms will be shown to customers during the booking process.
- Min Capacity: Sets the minimum number of guests required to complete a reservation.
- Max Capacity: Defines the maximum number of guests allowed per reservation.
- Cancellation Window: Specifies how far in advance a customer must cancel their reservation prior to the scheduled time.
- Reminder Window: Determines when a reminder notification is sent to the customer before their reservation begins.
- Booking Window: Sets how early a customer is allowed to make a reservation in advance.
- CRM Auto-Import: When enabled, customers who make a reservation will be automatically added to your CRM database.
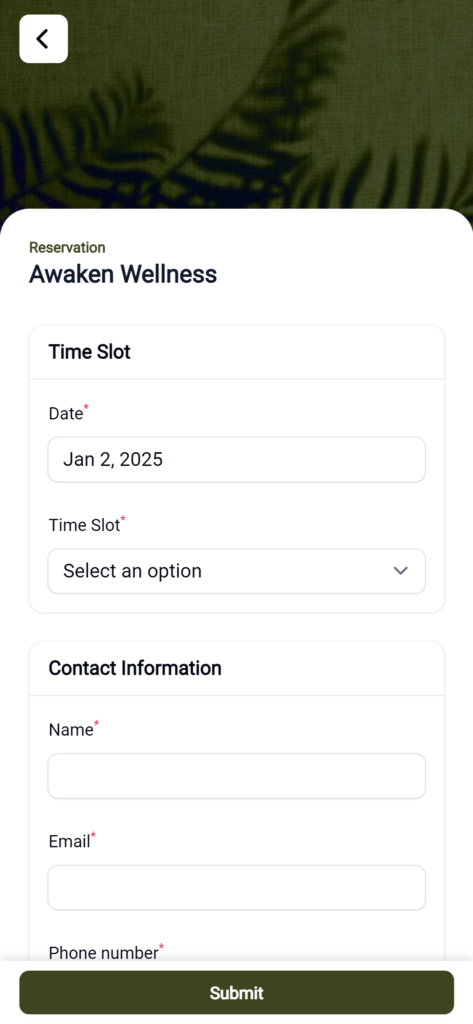
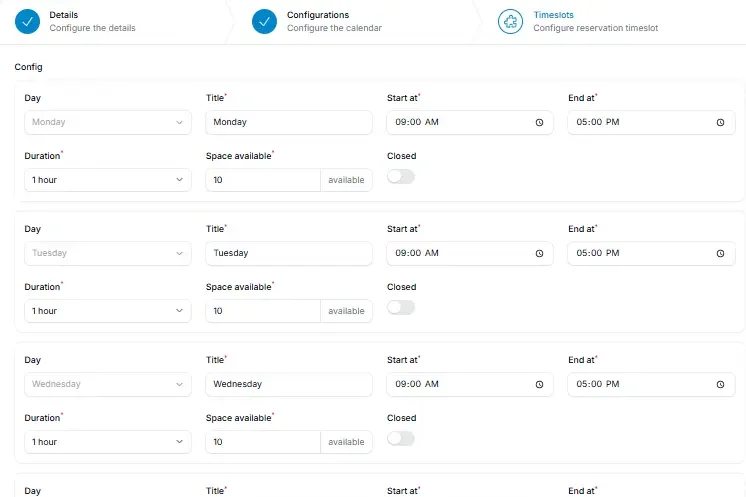
Step 5: Configure the Reservation Timeslot #
In this section, define the day(s), time slots, slot availability, and duration for each reservation. This ensures that your calendar accurately reflects your service schedule and availability.
Step 6: Calendar Successfully Created #
Once all configurations are complete and saved, your calendar will be successfully created and ready to accept reservations.
4.0 Activate the Reservations Feature #
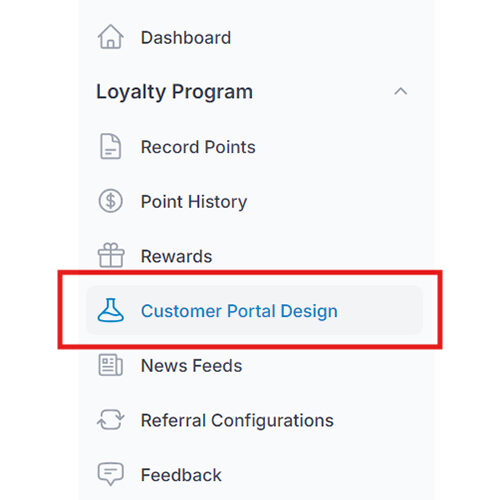
Step 1: Access Customer Portal Design #
From the dashboard, click on “Customer Portal Design” to begin enabling the reservation feature for your customer portal.
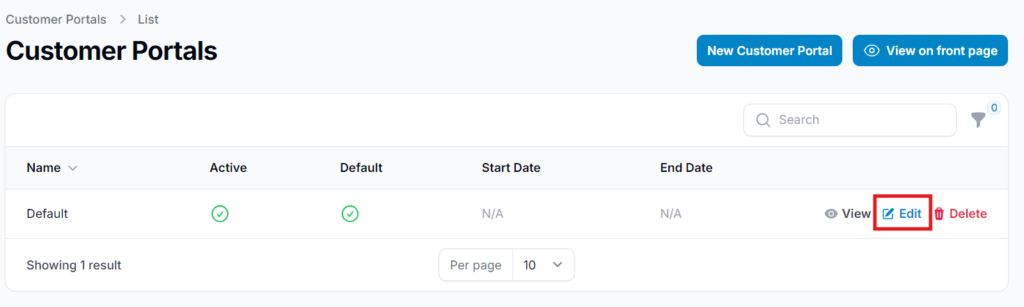
Step 2: Edit the Portal #
Click on “Edit” next to the customer portal where you want to activate the reservation feature.
Step 3: Enable the Reservation Feature #
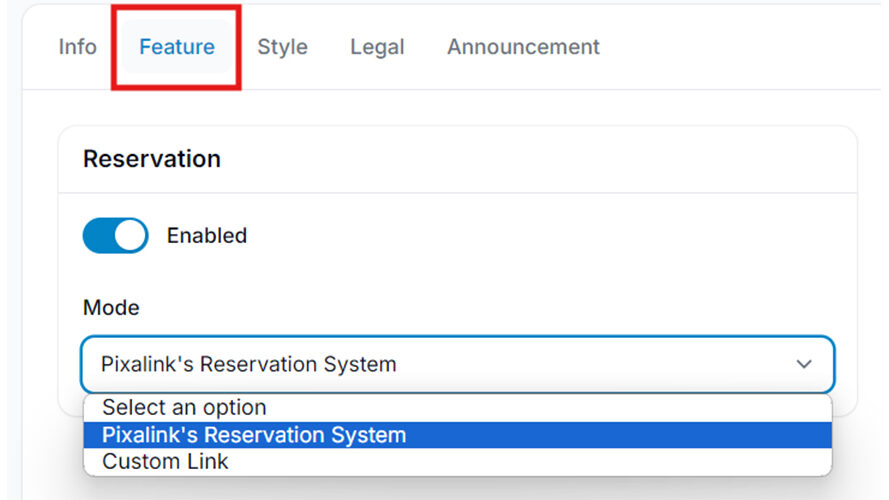
In the “Features” section, enable the Reservation option and click “Save Changes.”
You can choose between two reservation methods:
- Pixalink’s Reservation System: Use the calendar you have previously configured within Pixalink.
- Custom Link: Redirect customers to your own reservation system by entering your external booking URL.
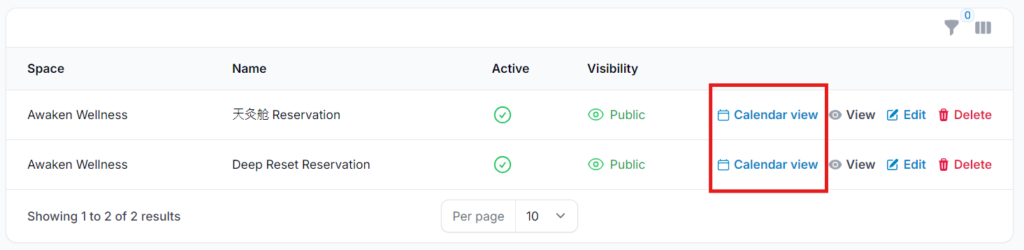
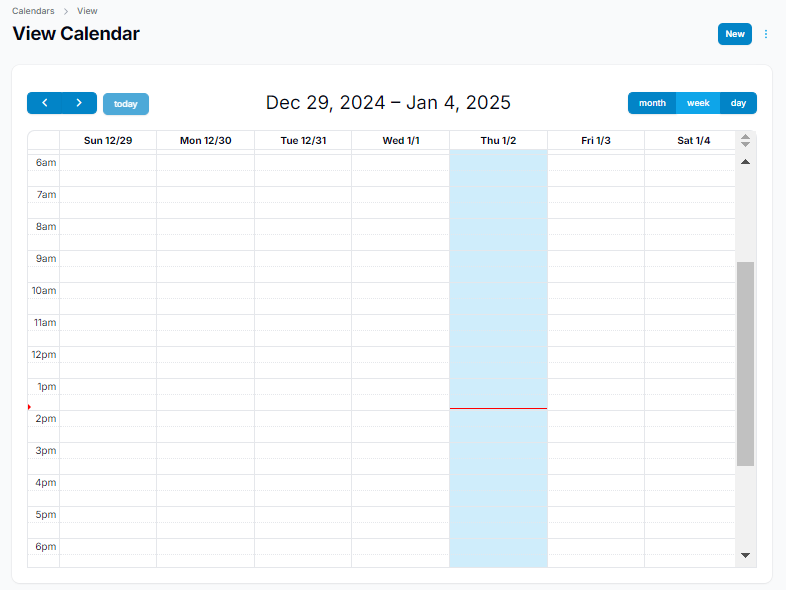
4.1 Calendar View #
The Calendar View feature displays customer reservations in a calendar format, allowing you to easily view and manage bookings by day, week, or month. This organized layout provides a clear overview of scheduled reservations, helping streamline operational planning.
4.2 Advanced Edit Options #
After creating your calendar, you can click “Edit” to access advanced settings. This allows you to adjust reservation schedules, notification settings, and block specific dates as needed.
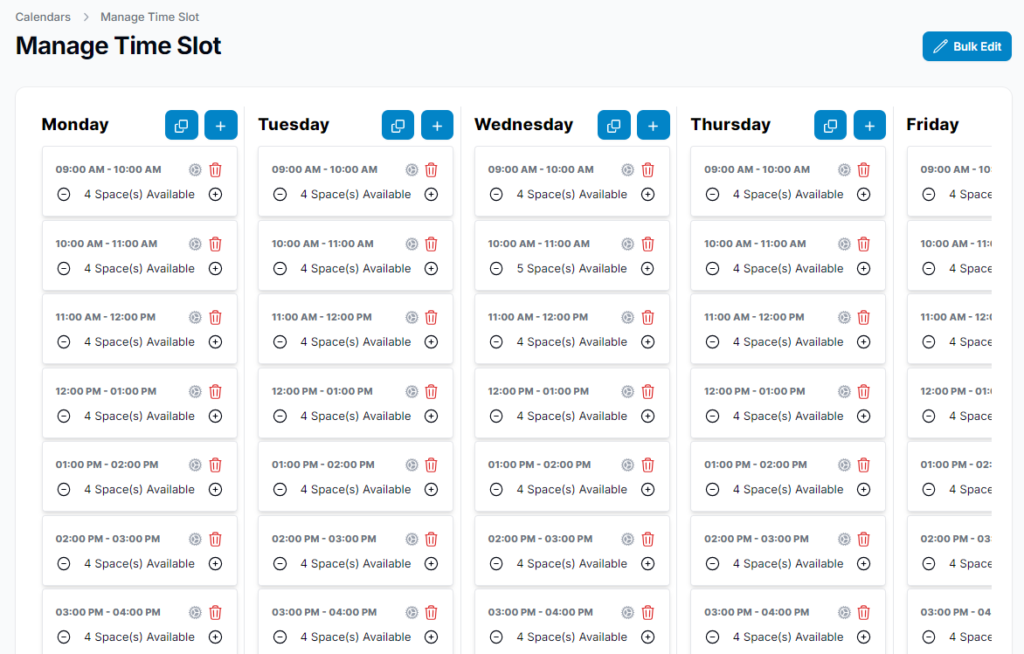
- Modify Time Slot Located at the top right of the page, this option enables you to change the time, day, and slot availability based on your service duration and operational hours.
- Bulk Edit Also available at the top right, Bulk Edit allows you to update or delete multiple time slots or reservations at once. This is useful for applying changes such as availability, capacity, or duration across multiple entries efficiently. Delete multiple reservations or time slots at once, saving time by applying changes such as availability, capacity, or duration across several entries simultaneously.
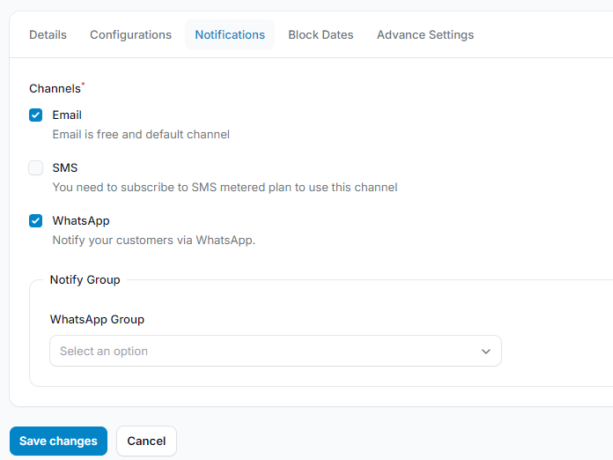
4.3 Notifications #
- The Notifications feature allows you to send automated alerts to both your business and your customers. Notifications can be delivered via email, SMS, or WhatsApp, and can be configured for key actions such as:
- Booking confirmations
- Reminders before scheduled reservations
- Cancellations
- Reservation updates
- This ensures timely communication and enhances the overall customer experience.
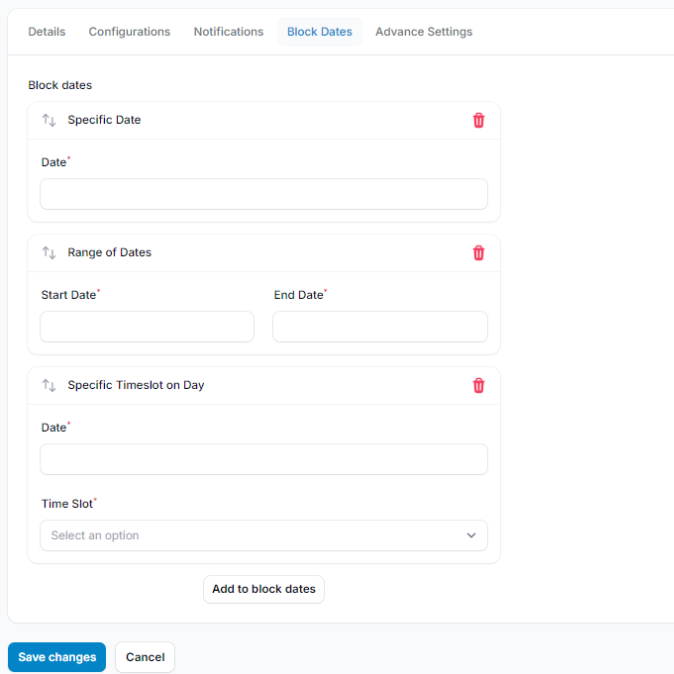
4.4 Block Dates #
The Block Dates feature allows you to mark specific dates or times as unavailable for reservations—ideal for holidays, maintenance, or temporary closures. Once added, these blocked periods will no longer be shown as bookable options to customers.
You can block availability using the following options:
- Specific Date – Block a single calendar date.
- Range of Dates – Block multiple consecutive days.
- Time Slot – Block specific hours within a day.
5.0 Advanced Settings #
The Advanced Settings section allows you to customize automated messages sent to customers for cancellations, reminders, and reservation approvals.
You can also tailor the notifications sent to you (the vendor) when a customer books or cancels a reservation, ensuring timely updates and consistent communication.

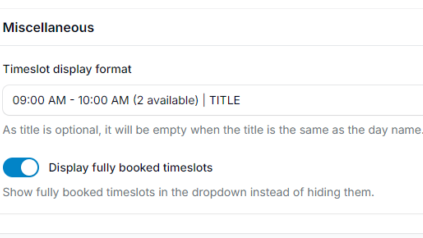
6.0 Display Fully Booked Time Slots (Advanced Settings) #
- This setting lets you control the visibility of fully booked time slots on the customer-facing calendar.
- When enabled, customers will be able to see which time slots are no longer available, helping to manage expectations and improve booking transparency.