How To Add A New User to Your Team #
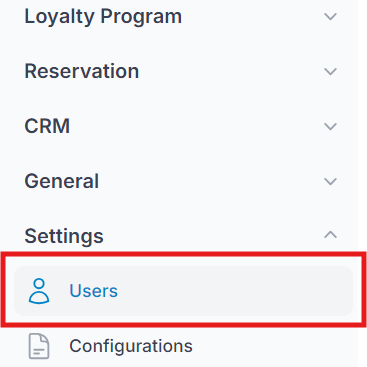
Step 1: From your dashboard, go to Settings and select “Users.” #
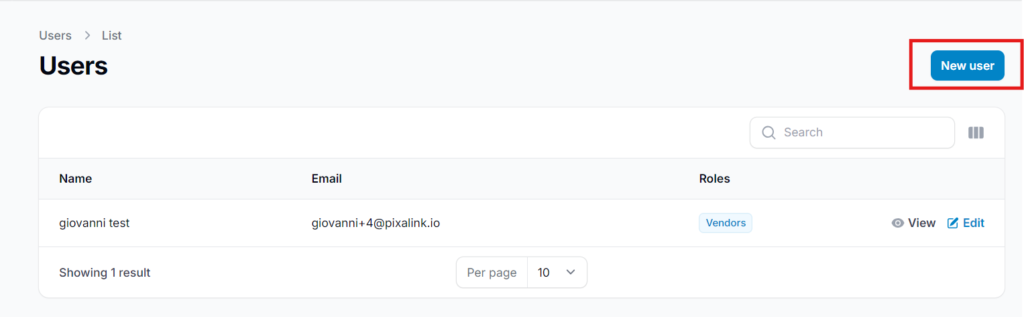
Step 2: Click “New User” at the top right side of the page. #
Step 3: Fill in the new user’s information: #
- Name: Enter the name of the new user.
- Email: Enter the email address of the new user.
- Roles: Select the appropriate role:
- Vendors – Full access
- Staff – Limited access
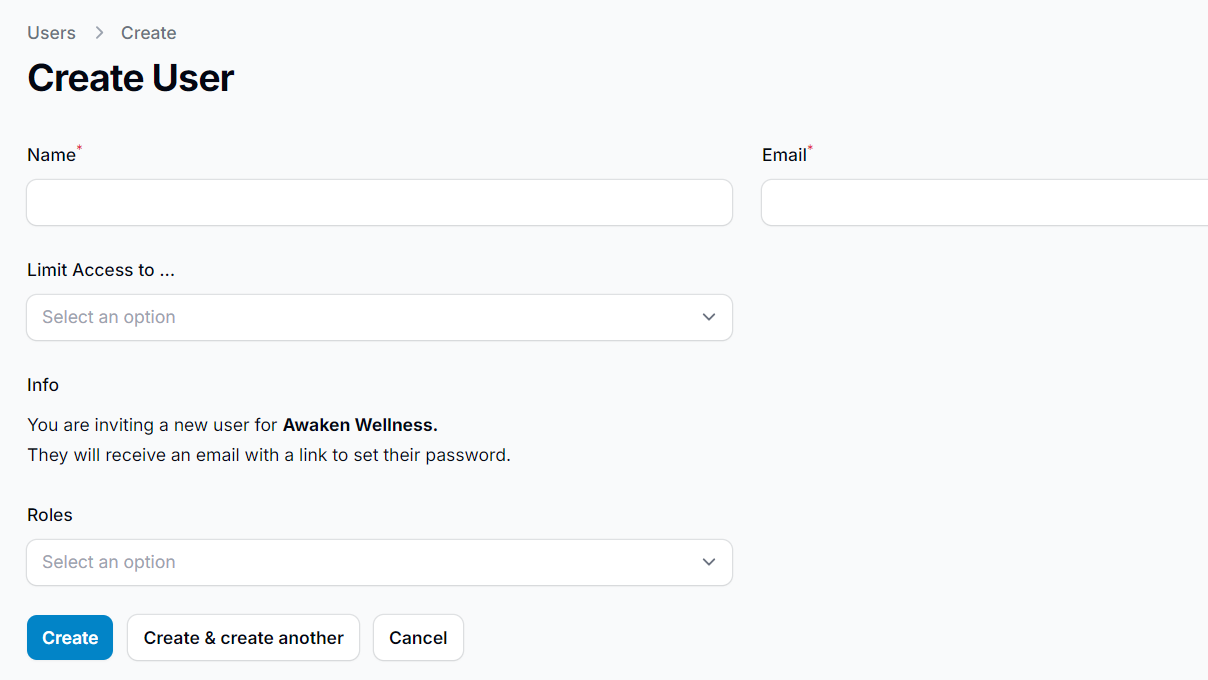
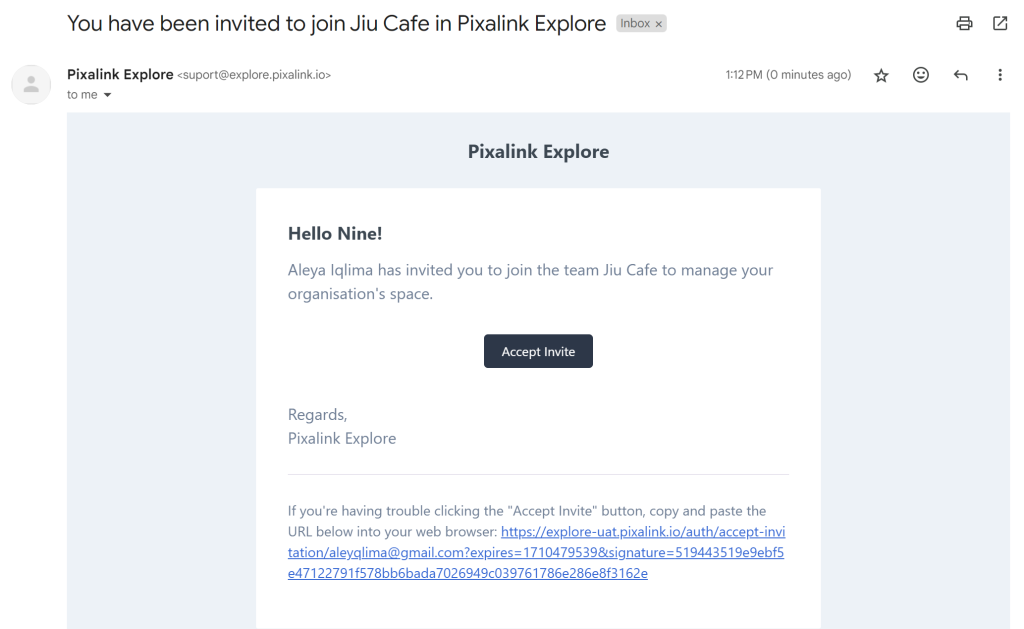
Step 4: Once the new user is created, they will receive an invitation email to join the space. #
The new user must do one of the following to activate their account:
- Copy and paste the provided URL into their web browser..
- Click the “Accept Invite” button in the email, or Copy and paste the provided URL into their web browser.
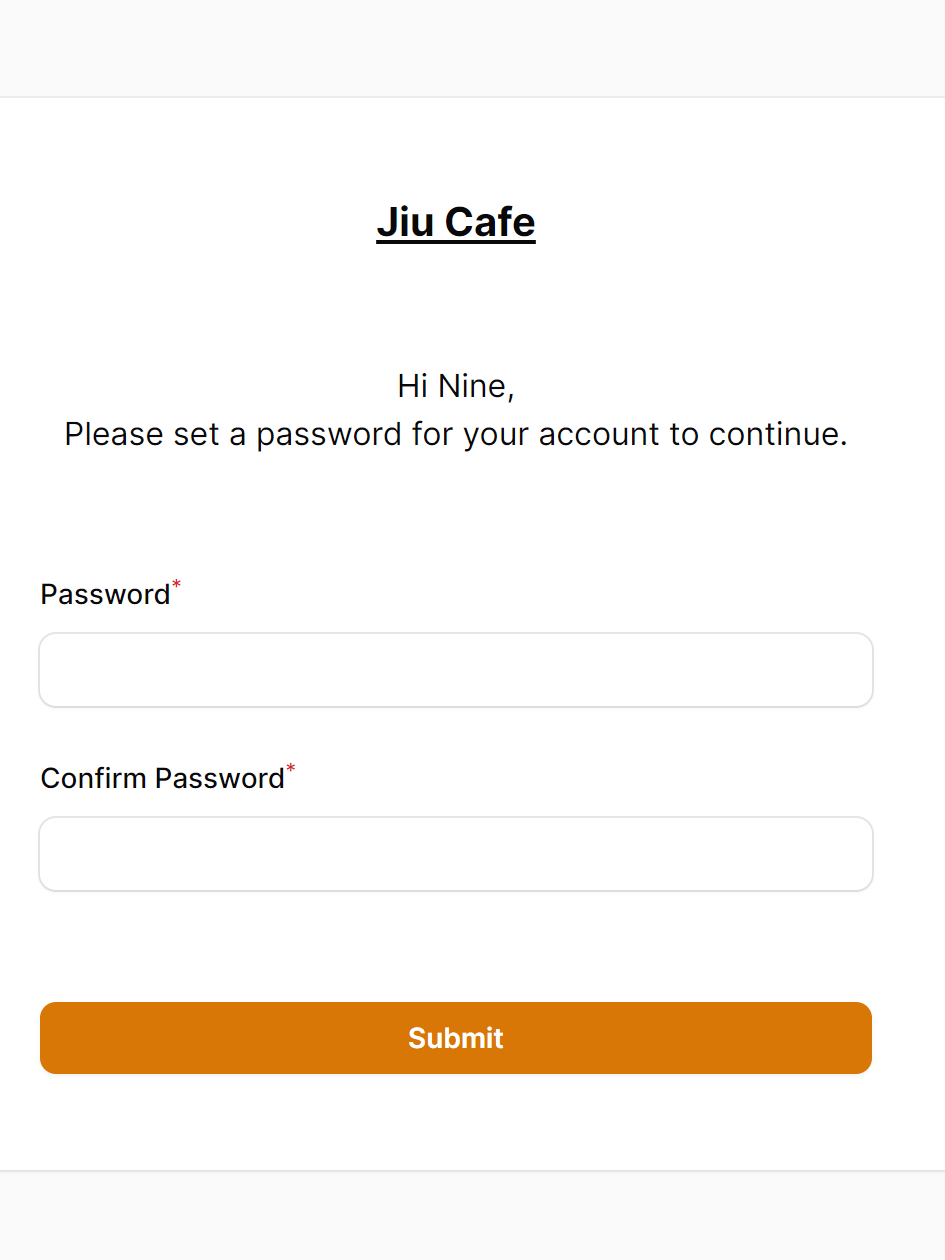
Step 5: Set the password and access the back end. #
The invitation email will redirect the new user to create a password for their account. Once the password is set, they will be able to log in and access the back end.