1.0 What Are Referrals? #
Referrals happen when someone recommends a product, service, or brand to another person often by sharing a referral link or code. If the person signs up or makes a purchase, both the referrer and the friend can receive rewards, such as discounts or credits.
Referral programs benefit everyone:
- Businesses gain new customers through trusted, word-of-mouth recommendations
- Customers are rewarded for sharing
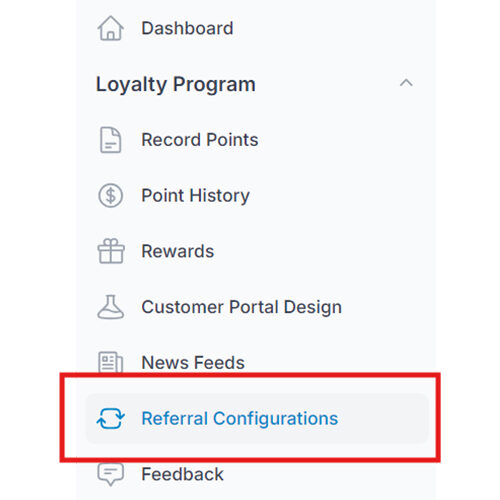
2.0 Referral Setup Instructions #
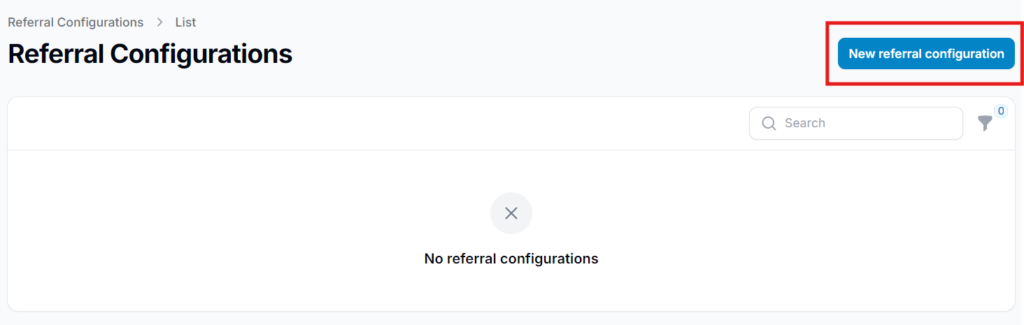
Step 1: From your dashboard, select “Referral Configurations.” #
Step 2: Click “New Referral Configuration” #
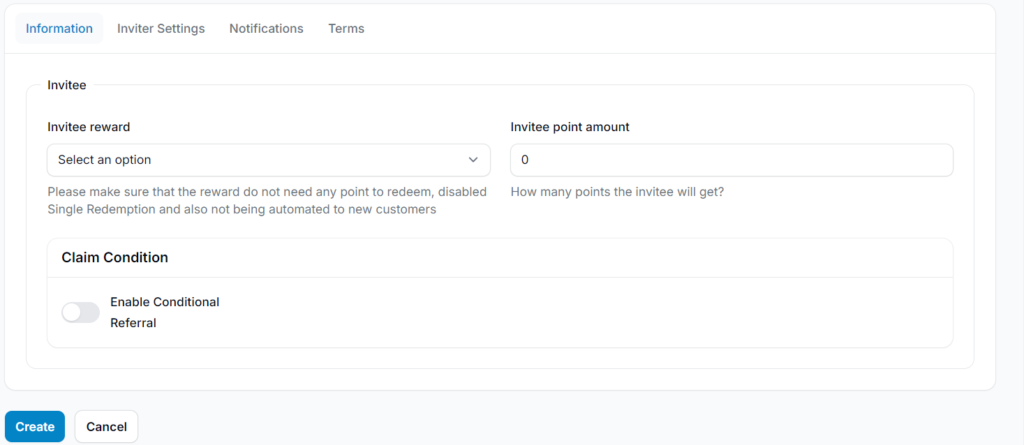
Step 3: Fill in the Referral Details #
Enter all necessary information for the referral configuration. You can choose to:
- Reward the invitee with points, or
- Select a reward from your existing rewards list.
Make sure to define how the referral works and what the user will receive upon a successful referral.
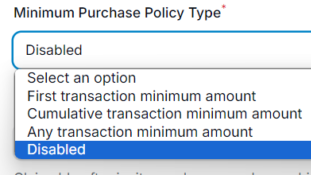
3.0 Additional Settings: Minimum Purchase Conditions #
You can also enable conditions that the invitee must meet to receive rewards or points.
To do this:
- First Transaction Minimum Amount
The invitee must make a single transaction that meets or exceeds a specific amount after signing up to qualify for the referral reward. - Cumulative Transaction Minimum Amount
The invitee can complete multiple smaller transactions, and the total must meet or exceed the minimum amount set. This allows flexibility over time rather than requiring one large purchase. - Any Transaction Minimum Amount
The reward is granted when any single transaction (regardless of when it occurs) meets the minimum value. It does not have to be the first transaction. - Disable
No minimum transaction amount is required. As soon as the invitee signs up, the inviter receives the reward, regardless of whether a purchase is made.
Step 4: Click “Create” #
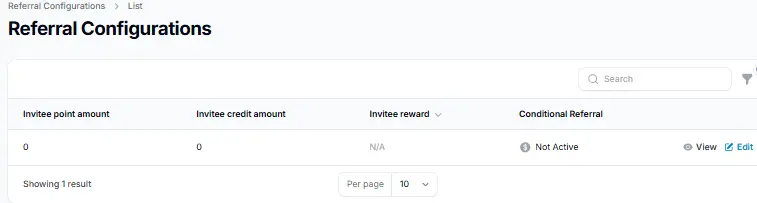
Once all details are filled in, click the “Create” button. Your referral configuration will then appear in the Referral Configurations list, ready to be activated or managed.
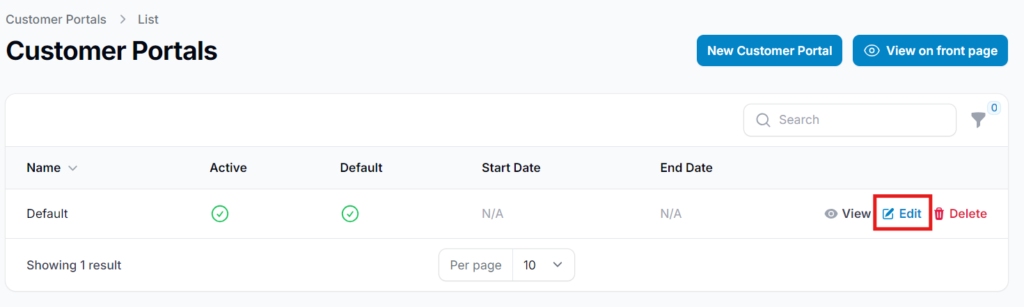
Step 5: Activate the Referral Program #
To activate your referral configuration:
- Go to Customer Portal Design
- Click Edit
This allows you to enable the referral feature so it becomes visible and usable for customers in the portal.
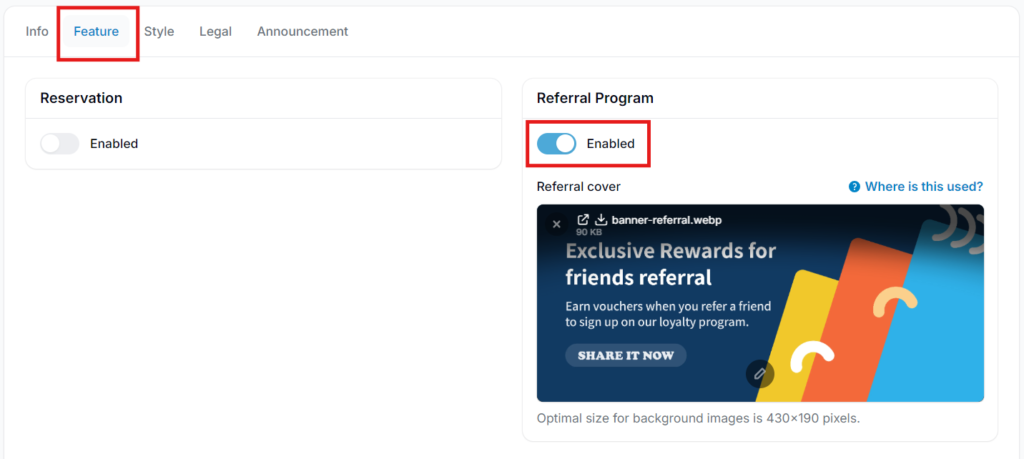
Step 6: Enable the Referral Feature and Save Changes #
In the “Features” section:
- Toggle Referral to enable it
- Click Save Changes
You can also edit the referral cover image to match your branding. Once saved, your referral setup is complete and ready for use.
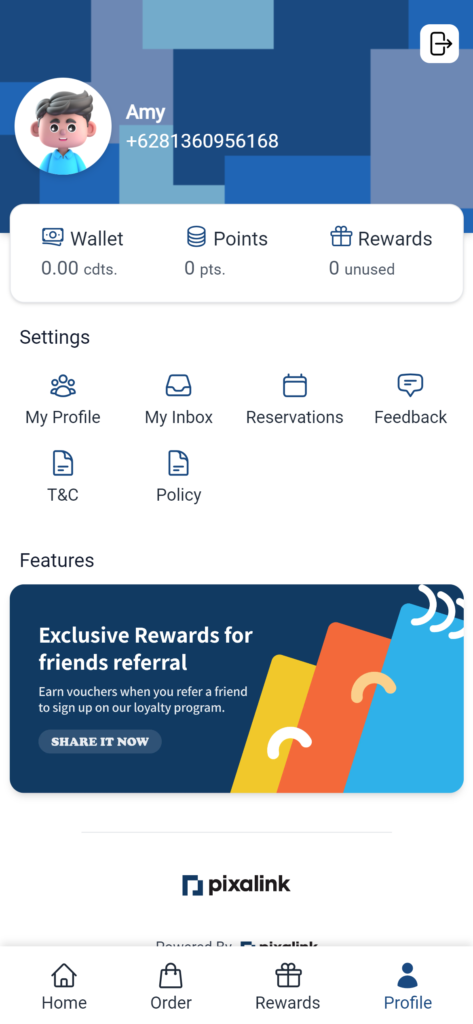
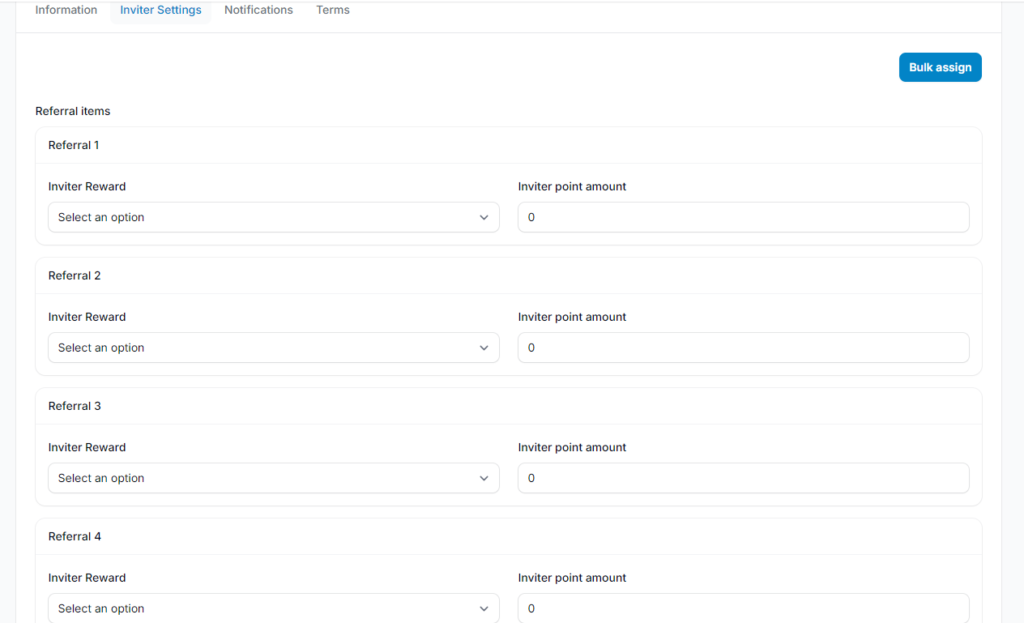
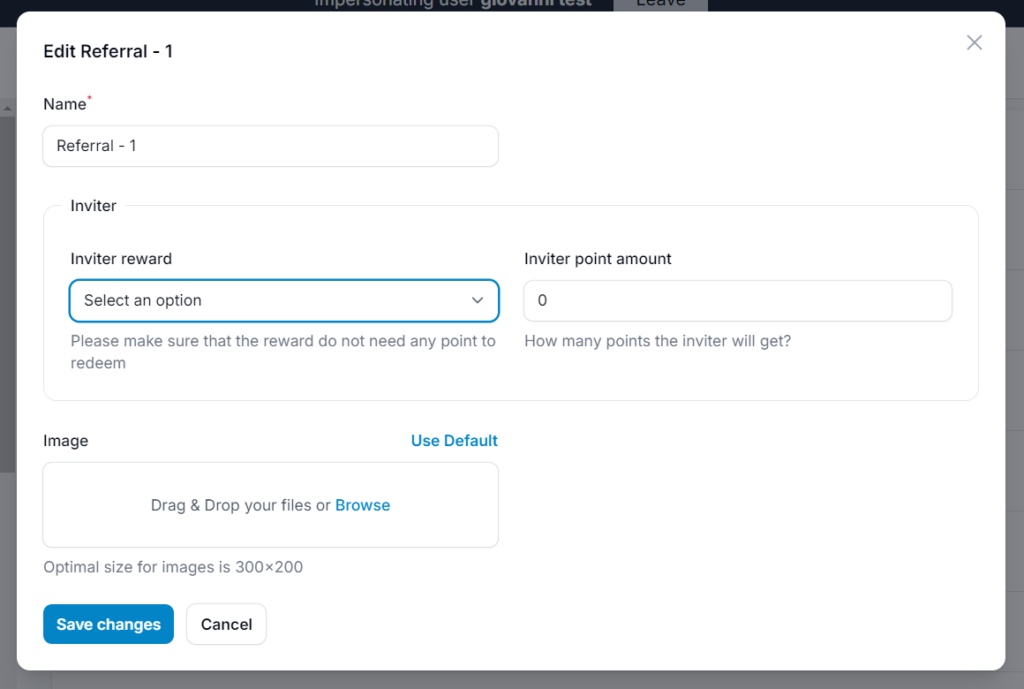
4.0 Inviter Settings #
Inviter settings allow you to define the points or rewards given to the inviter for each successful referral.
You can choose to:
- Assign the same reward for every referral, or
- Set different reward values based on your campaign strategy
This helps you manage how much each inviter earns and tailor your referral program accordingly.
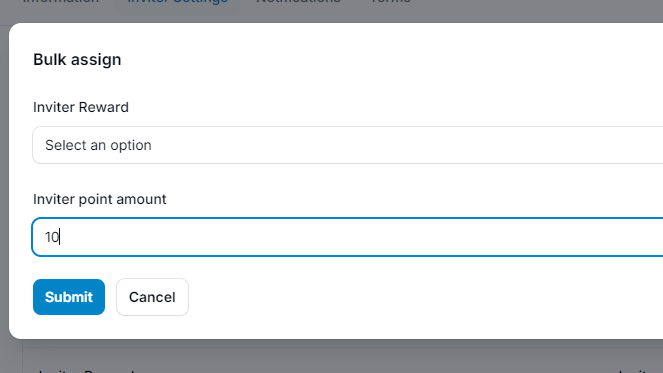
5.0 Assigning the Same Reward to All Referrals #
To apply the same reward or points to all referrals:
- Click “Bulk Assign” at the top right of the page
- This will automatically apply the selected reward or point value to all referral entries
This option simplifies the setup when you want every inviter to receive the same benefit for each successful referral.
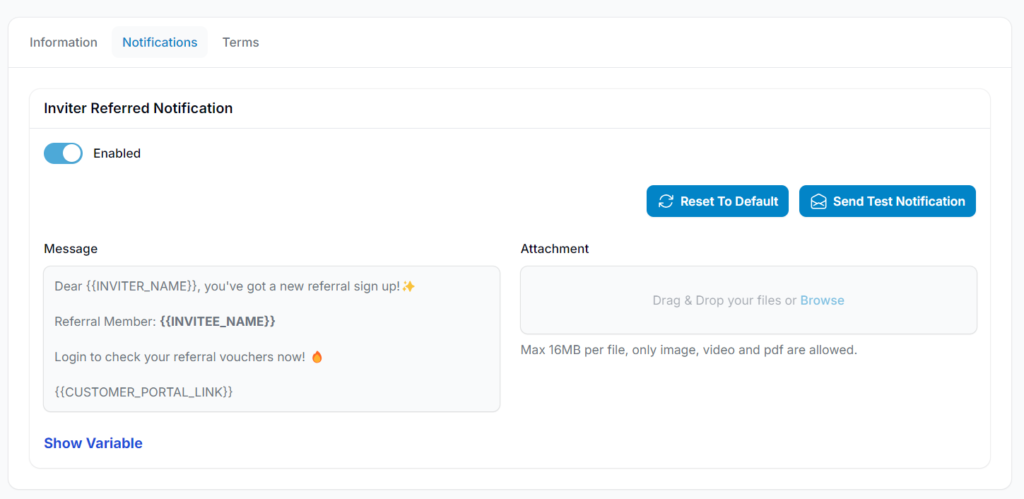
6.0 Notifications #
You can enable notification settings to alert the inviter whenever someone signs up using their referral link.
Additionally, you can:
- Customize the message to match your brand tone or style
- Attach media such as an image, video, or PDF to make the notification more engaging and informative
This feature helps keep inviters informed and motivated to continue sharing your referral program.
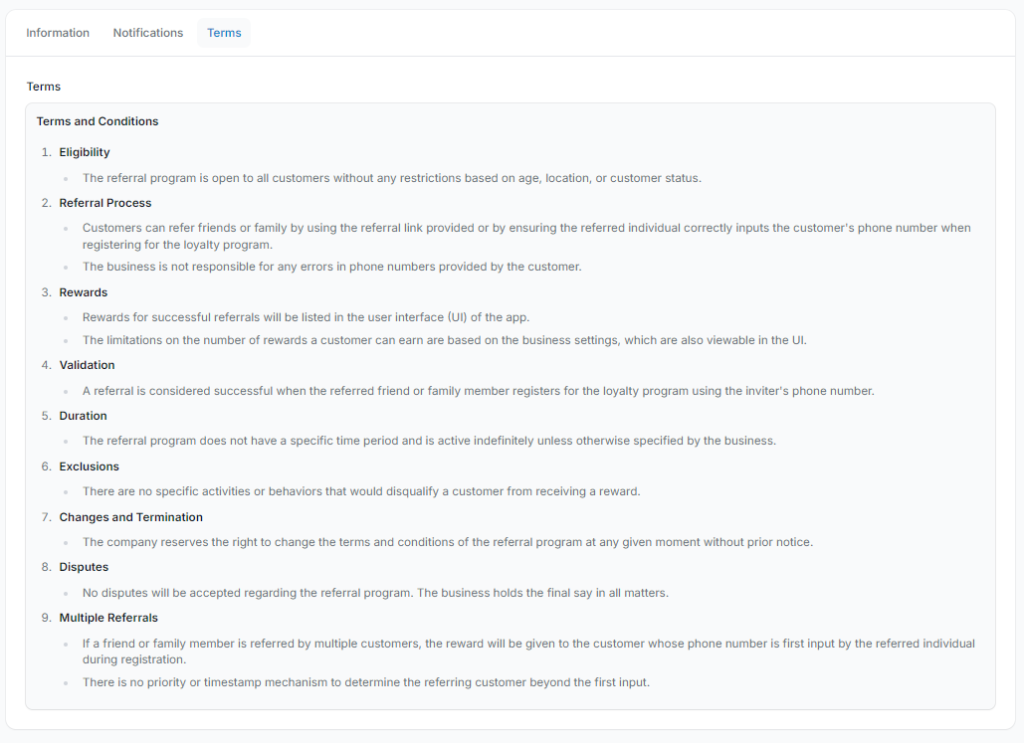
7.0 Terms & Conditions #
You can edit the referral terms and conditions to align with your business policies.
Pixalink provides a default template that you can fully customize to match your brand’s guidelines, legal requirements, or specific referral rules.
This ensures transparency and sets clear expectations for both inviters and invitees.
8.0 Image Size Options #
- Original – Keeps the original aspect ratio
- Square (1:1) – Equal width and height
- Standard (4:3) – Common for displays and prints
- Portrait (3:4) – Taller than wide
- Classic (3:2) – Traditional photo size
- Classic Portrait (2:3) – Taller classic format
- Wide (16:9) – Widescreen format (ideal for videos)
- Tall (9:16) – Vertical, ideal for mobile viewing
- Custom – Define your own width and height
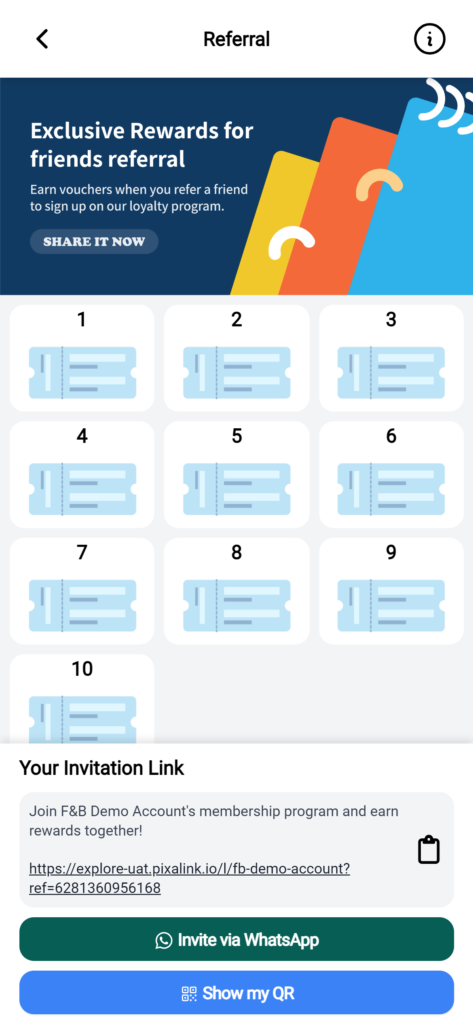
9.0 Track Your Referral Activity #
There are two ways to check referral usage:
- Via Referral Configuration
- Go to Referral Configuration
- Click View on the specific referral
- Scroll down to the section with referral details
- Look at the “Total Reward” column — this shows how many customers have used the referral

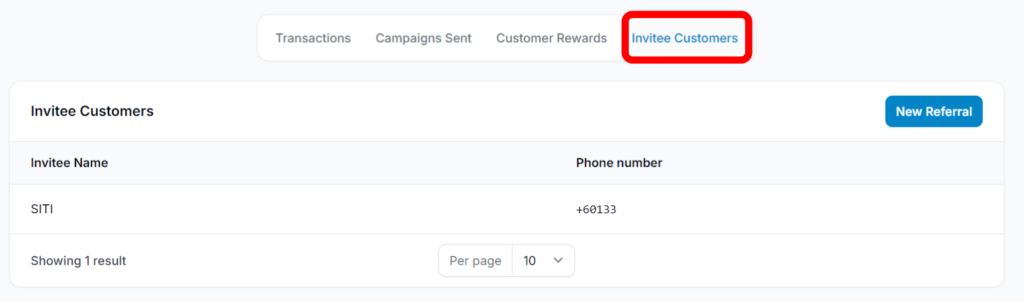
10.0 How to Check Who a Customer Has Invited #
- To see which customers were invited by a specific user:
- Go to Customers (CRM). Search for the customer’s name.
- Click View. Scroll down and select “Invitee Customers”.
- You’ll be able to see a list of invitees along with their phone numbers in the column.
11.0 How To Customize the Referral Ticket Image #
- Go to Referral Configuration
- Click View on the desired referral
- Scroll down to the image section
- Click on the ticket image or Edit
- Upload your custom image
- Click Save Changes
This allows you to personalize the referral ticket to match your brand style or campaign theme.

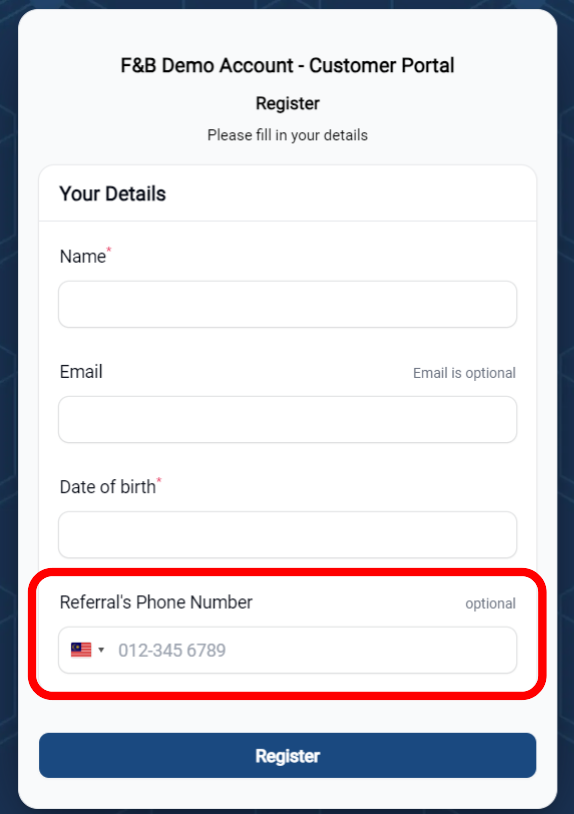
12.0 How Does the Invitee Log In Using the Referral Link? #
When the invitee clicks the referral link shared by the inviter or scans the inviter’s QR code, they’ll be redirected to the loyalty program sign-up page.
Here’s what happens next:
- The invitee fills out their personal details
- They enter the inviter’s phone number (if not auto-filled)
- After completing the sign-up, both the invitee and inviter receive their rewards
- The inviter also gets a notification confirming the referral
This seamless process ensures both parties are rewarded and properly linked.