1.0 What Is a Customer Page? #
A Customer Page is a centralized section where you can view, manage, and organize customer information. It includes:
- Customer name and contact details
- Earned and available points
- Redemption history and rewards claimed
This page helps you better understand customer behavior, tailor rewards to individual preferences, and build more personalized relationships. It’s an essential tool for maintaining customer engagement and ensuring the success of your loyalty program.

2.0 How to Add a New Customer #
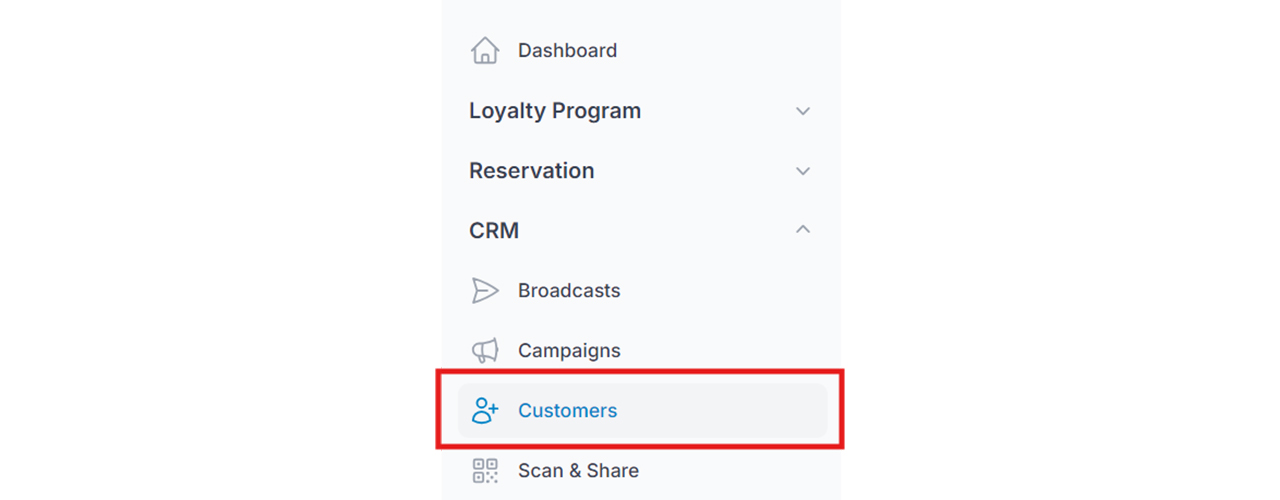
Step 1: Go to “Customers” from the Dashboard #
From your main dashboard, click on the “Customers” tab to access the customer management section. This is where you can view, add, or manage your customer list.
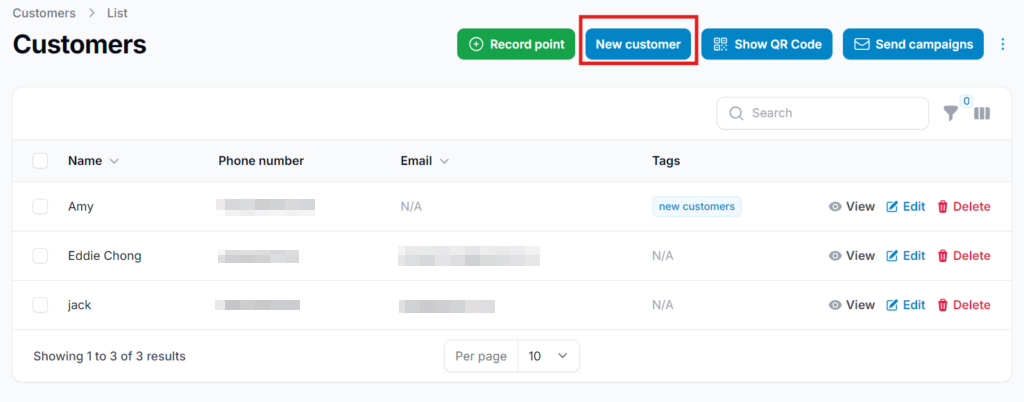
Step 2: Click “New Customer” #
Click the “New Customer” button to open the form for adding a new customer manually. This allows you to enter their details directly into your system.
Step 3: Fill in the New Customer Information #
Enter the customer’s details, including name, contact info, and other optional fields.
- Space: Indicates where the customer first registered. This is helpful for tracking sign-ups across multiple locations or platforms.
- Notes: Add any extra information such as preferences, feedback, or specific interactions to help personalize future engagement.
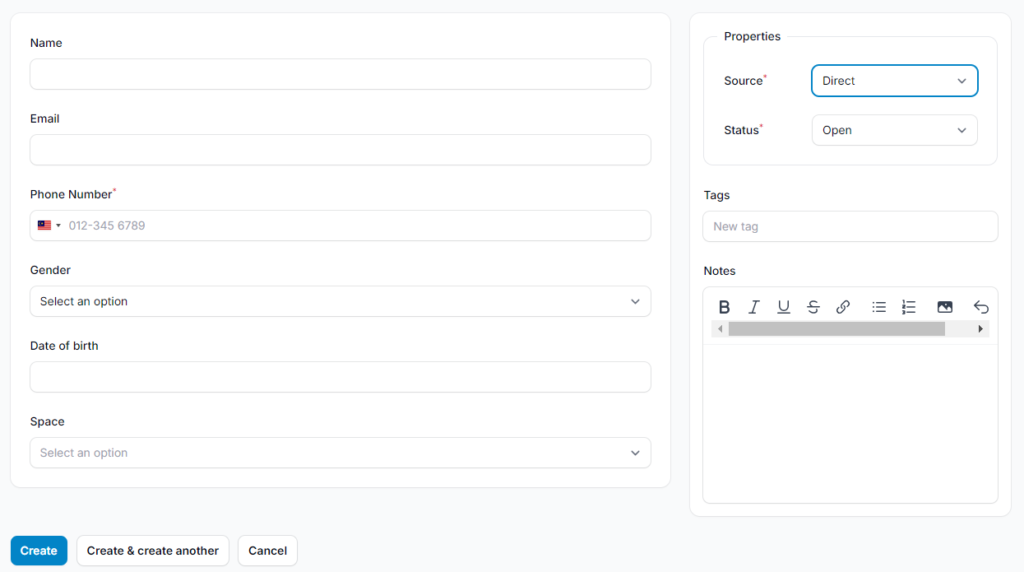
3.0 Properties: Source #
Source refers to the origin or channel through which a customer was acquired or joined your program.
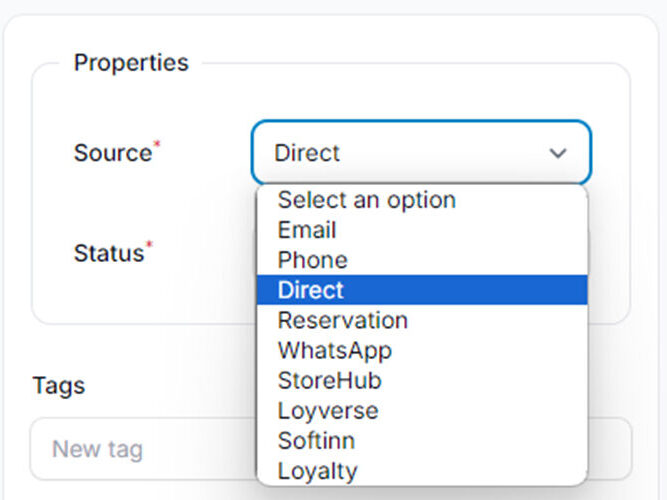
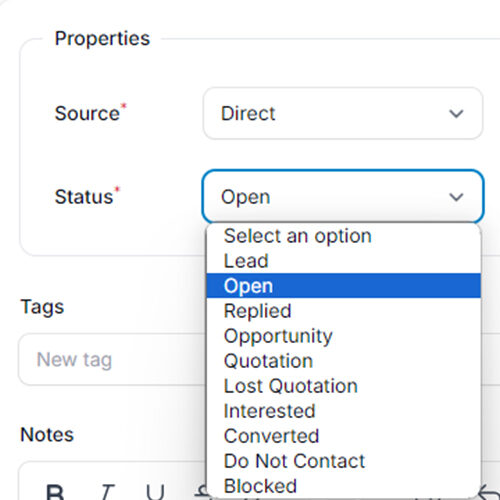
- Status indicates a customer’s current level of engagement or activity within your system, program, or platform.
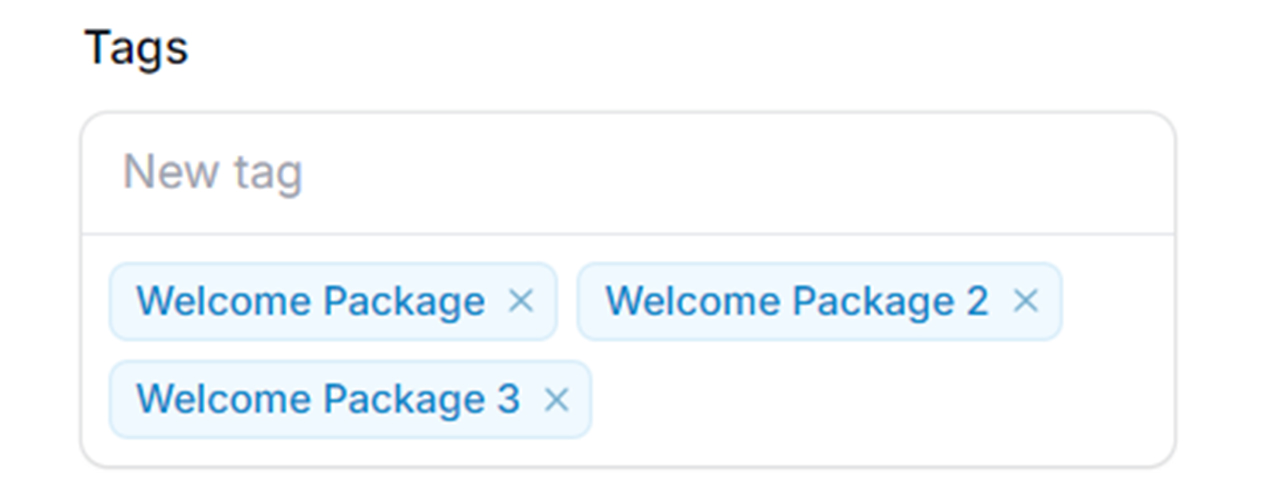
4.0 Tags #
Tags allow you to categorize and manage your audience more effectively based on customer behavior, preferences, or past interactions. You can apply tags to group customers for targeted campaigns or communication.
Additionally, tags can be used for reward tracking:
- Apply reward tags to categorize customers based on the rewards they’ve earned.
- To use reward tagging, enable “Auto-assign to Customers with Tags” in the Rewards Configuration.
- Once enabled, you can assign the appropriate tag to link it with a reward.
Tags are a powerful tool for personalizing your loyalty strategy and improving customer engagement.
Step 4: Click “Create” #
Once all required fields are completed, click “Create” to add the new customer. The customer will then appear in your Customer List for future management and engagement.

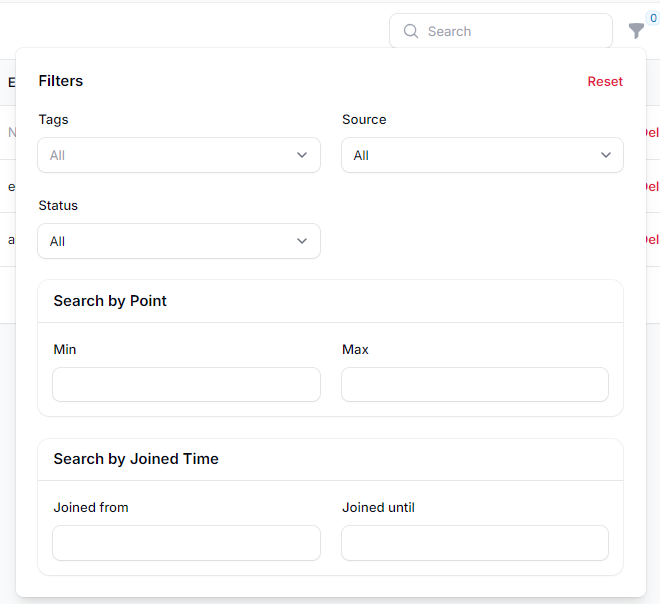
5.0 How to Filter Customers by Specific Criteria #
- Use the Filter feature to narrow down the customer list based on selected attributes. This helps you quickly find and manage targeted groups.
Available Filter ![]() Options:
Options:
- Joined Time – Filter by registration date
- Points – Filter by total earned or current point balance
- Status – Filter by activity level (e.g., Active, Inactive)
- Source – Identify how the customer joined (e.g., QR code, referral)
- Tags – Segment customers by assigned labels for targeted actions
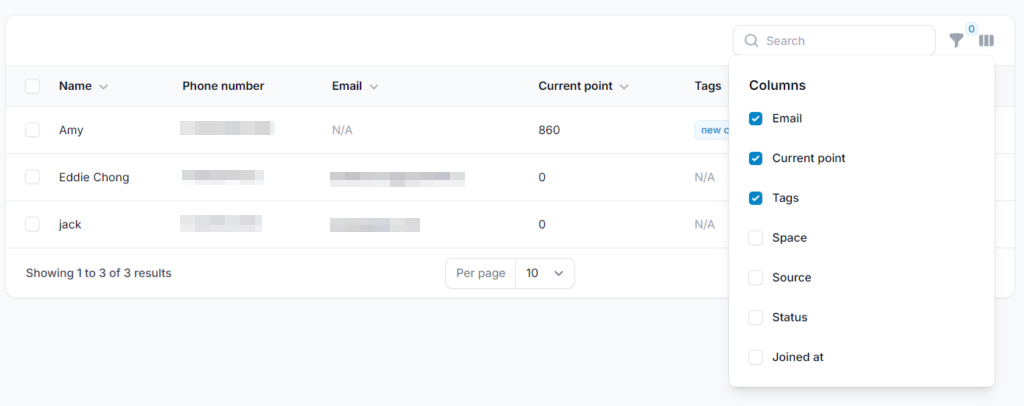
6.0 Toggle Column  #
#
The Toggle Column feature lets you customize the table view by selecting which columns to show or hide.
Use it to focus on the most relevant customer data—such as contact info, points, tags, or join date—based on your current needs. This helps keep your workspace organized and easier to navigate.
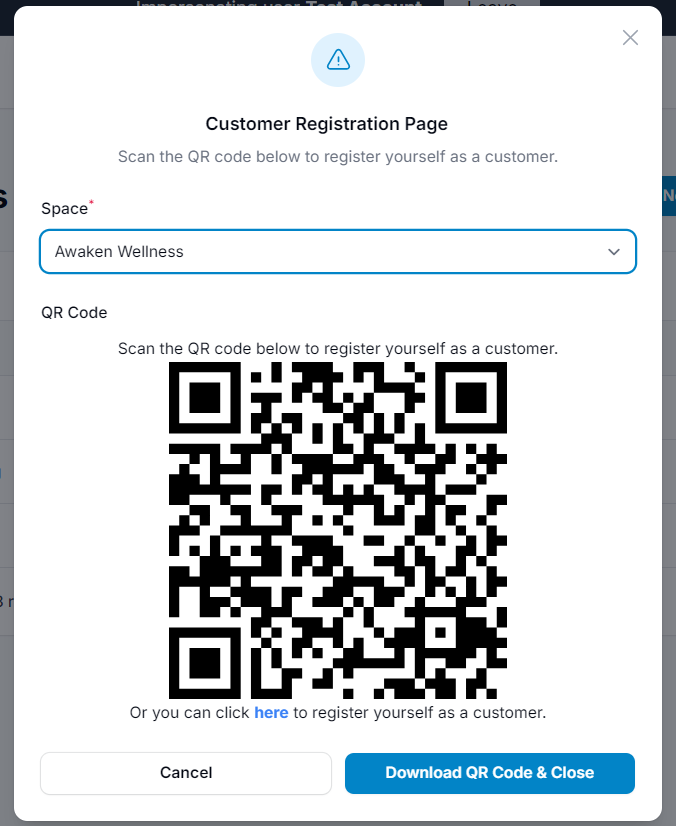
7.0 Download the QR Code for Customer Sign-Up/Login #
You can download a QR code to display at your cashier or store entrance, making it easy for customers to sign up or log in to your loyalty program.
How to Download:
- Click “Show QR Code”
- Click “Download QR Code & Close”
Display the QR code prominently to encourage quick and convenient access for your customers.