What Is The Customer Portal? #
Definition #
The Customer Portal is a customizable interface that allows businesses to design their loyalty page in alignment with their brand. You can personalize the homepage banner, logo, and brand colors to reflect your identity.
Beyond design, the portal provides access to a range of configurable features to enhance the customer experience, including:
- Reservation system
- Feedback collection tool
- Referral program
- Reward redemption visibility, etc
These tools are designed to drive customer engagement, improve retention, and support overall loyalty program performance.
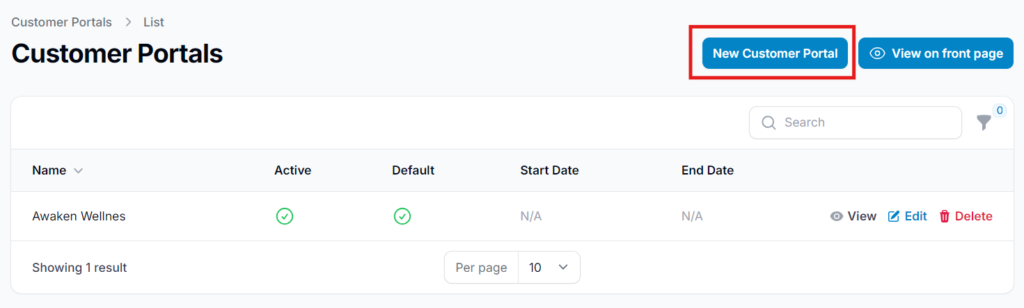
How To Create The Customer Portal #
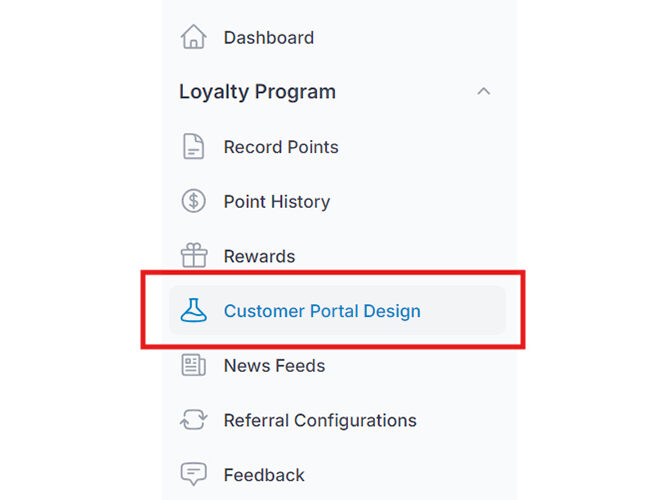
Step 1: Access the Customer Portal Design Section #
From the dashboard, select “Customer Portal Design” to begin setting up and customizing your customer-facing loyalty portal.
Step 2: Create “New Customer Portal” #
Click on “New Customer Portal” to initiate the setup of a new loyalty portal for your customers.

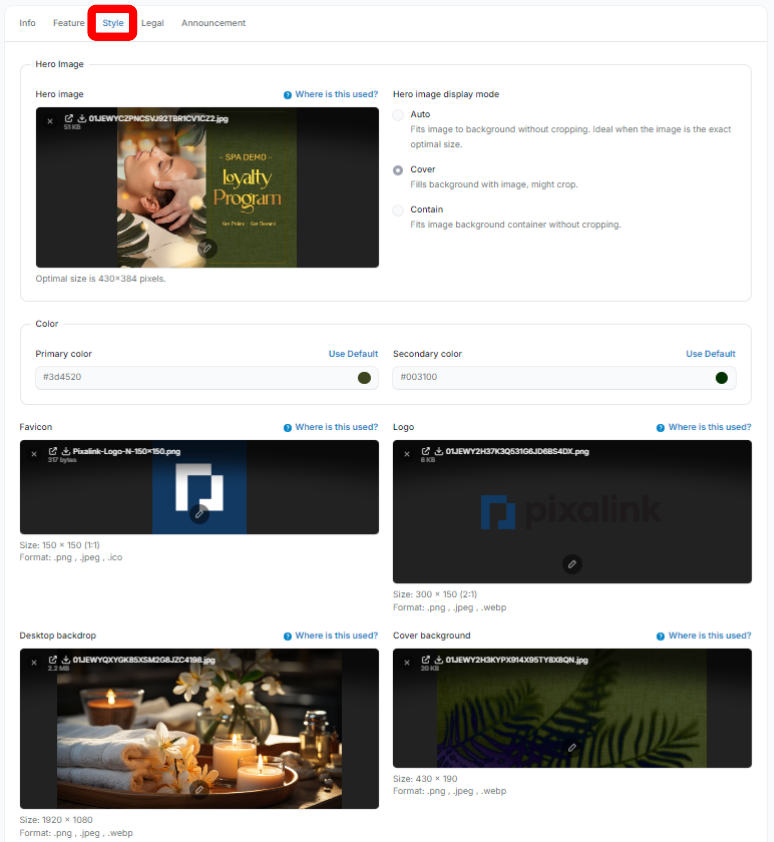
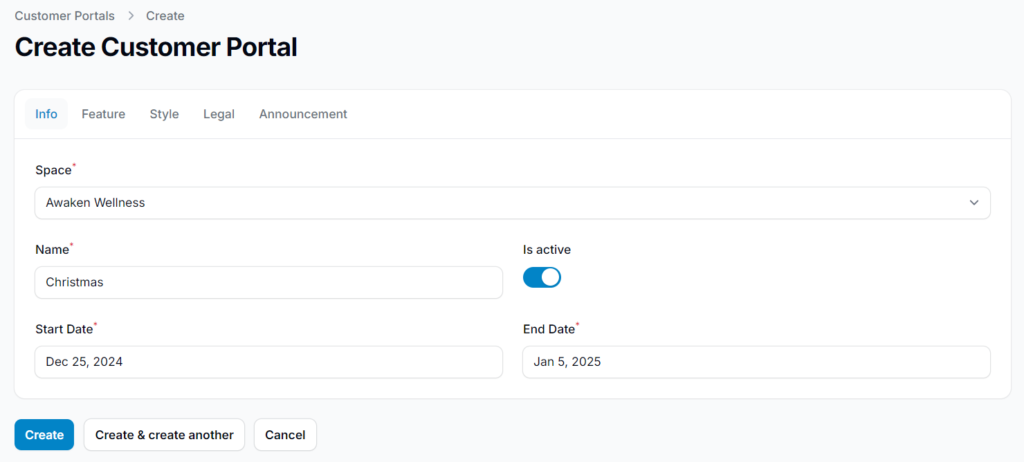
Step 3: Complete The Required Details And Customize The Design #
Fill in the required fields and click “Style” to customize the portal’s design.
Use “Where is this used?” to preview each section. Image size and format guidelines are shown below the upload area.
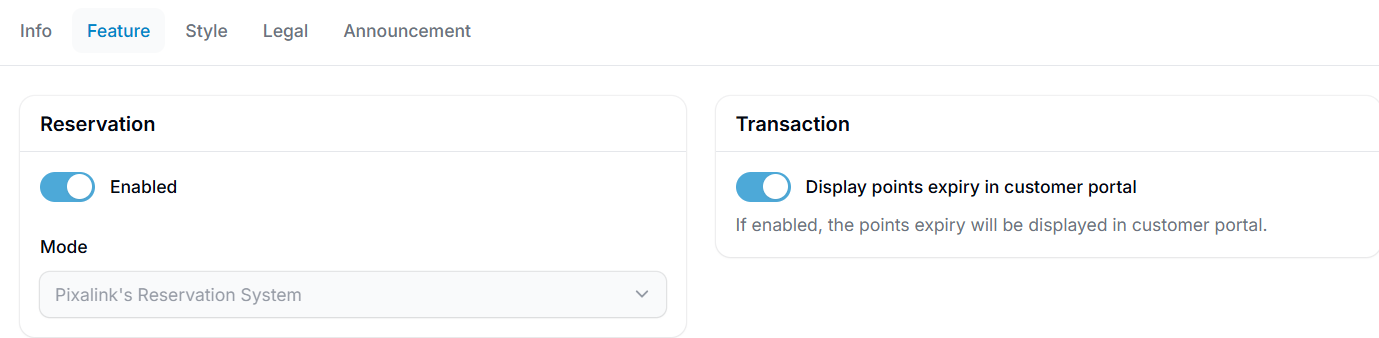
You may also enable specific features you wish to include in your loyalty program to enhance the customer experience.

Step 4: Click “Create” To Finalize The Setup. #
Once all information and design elements are in place, click “Create” to complete the setup.
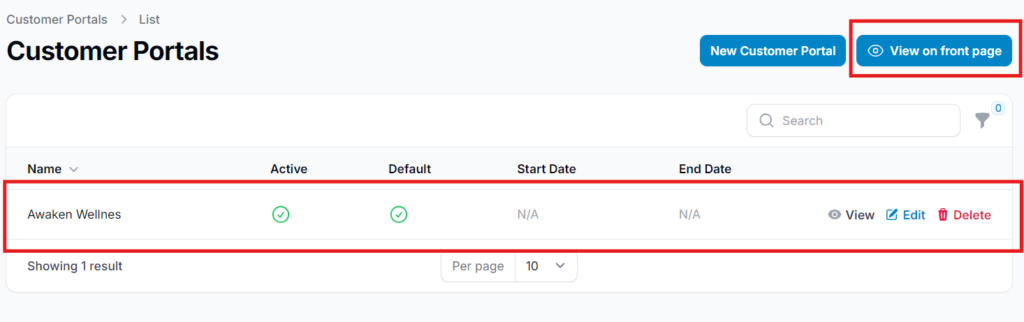
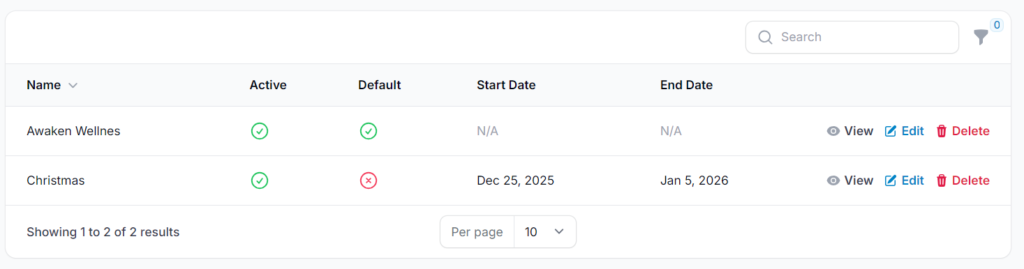
Your loyalty program layout will now appear on the customer portal’s front page.
To preview it, click “View on Front Page” which located at the top right corner during editing.
Can I Add Separate Theme For Specific Event Without Changing Default Design? #
Yes, you can create an additional customer portal with a unique design specifically tailored for the event, while keeping your default theme unchanged.
How To Steps: #
- Click “New Customer Portal.”
- Fill out all required information, similar to your default setup—upload event-specific images, logos, enable desired features, and apply branding elements based on the theme.
- Set the active duration for the event portal. Once the time ends, the system will automatically revert to the default design.
- Click “Create.” The new portal will appear in your list of customer portal designs.
This allows you to run limited-time campaigns or seasonal themes without disrupting your primary branding.
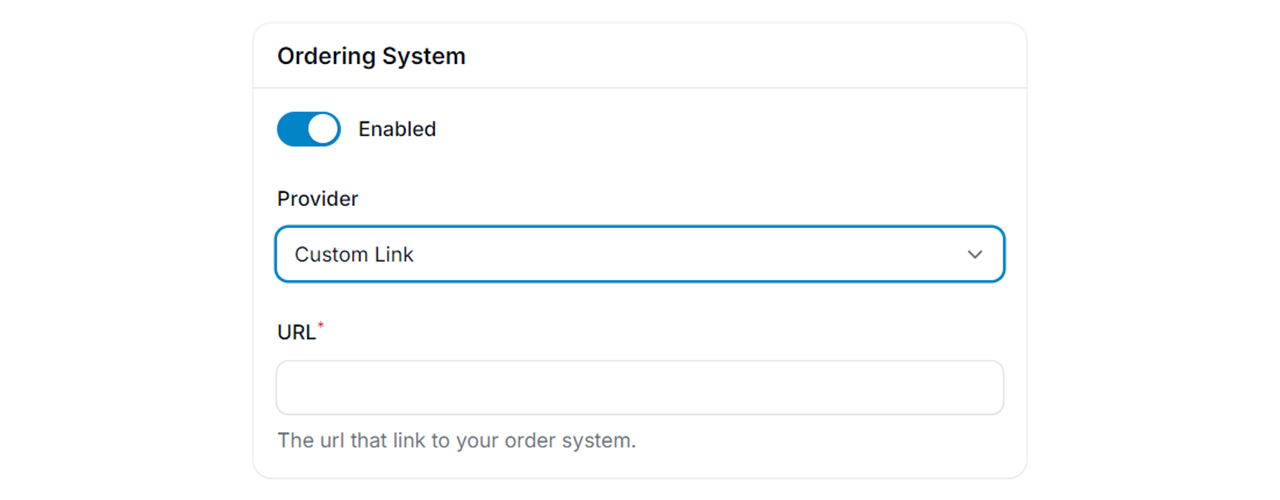
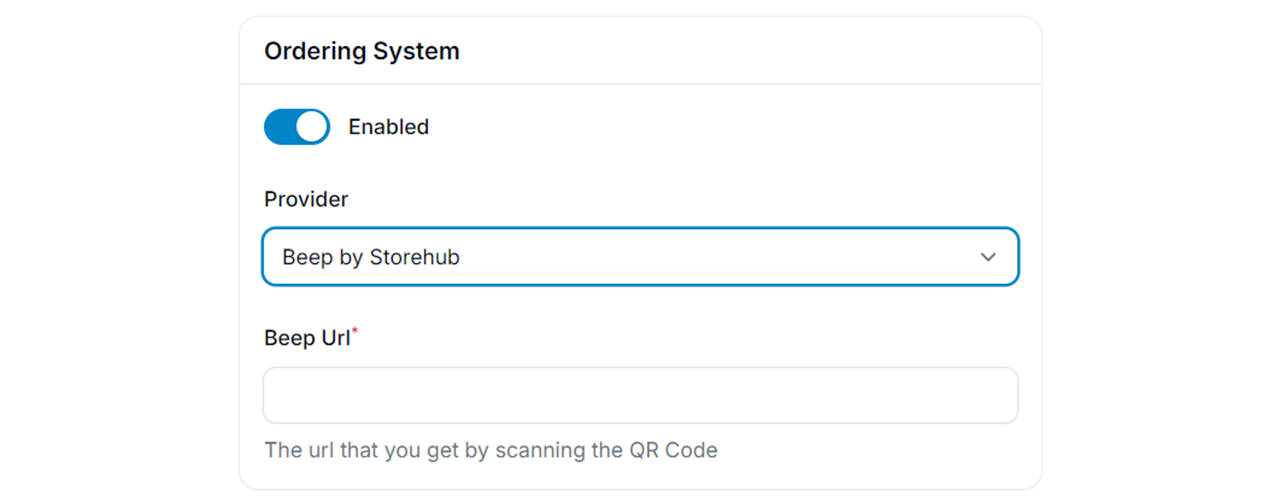
Feature: Ordering System #
ou may enable the Ordering System if your business sells products, operates a restaurant, or provides similar services. Pixalink offers two setup options:
- Custom Link:
If you already have an external ordering system on your website, you can attach the URL. Customers will be redirected to your site when placing an order.
If you do not have an existing ordering system, you may integrate Beep by StoreHub. This option requires a separate subscription. If you are already a StoreHub customer, you can proceed with this integration.
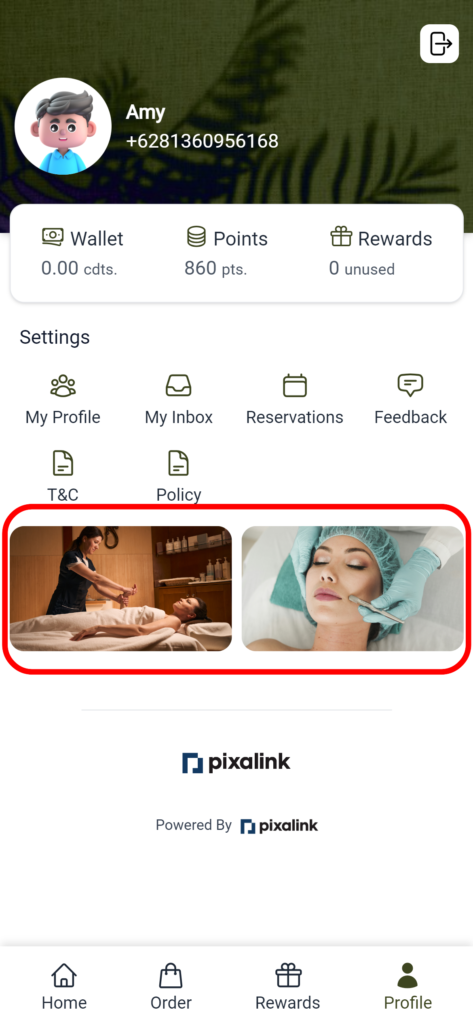
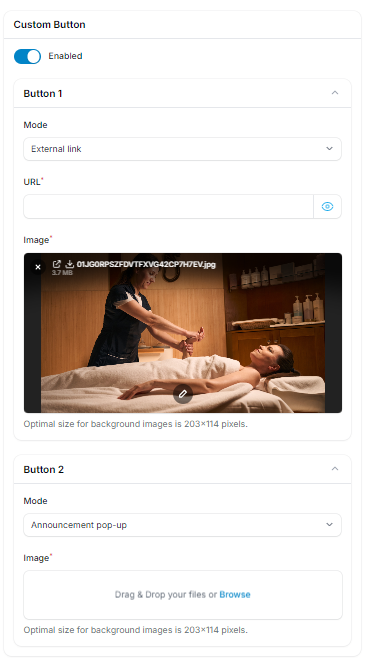
Custom Button #
The Custom Button appears on the customer’s profile page and can be configured to redirect users to a specific external link such as your brand’s website, social media page, or any relevant platform.
Additionally, you can assign an existing announcement to the button by selecting the “Announcement Pop-Up” option. (Note: the announcement must be created beforehand.) This allows for added engagement and visibility when customers interact with the button.
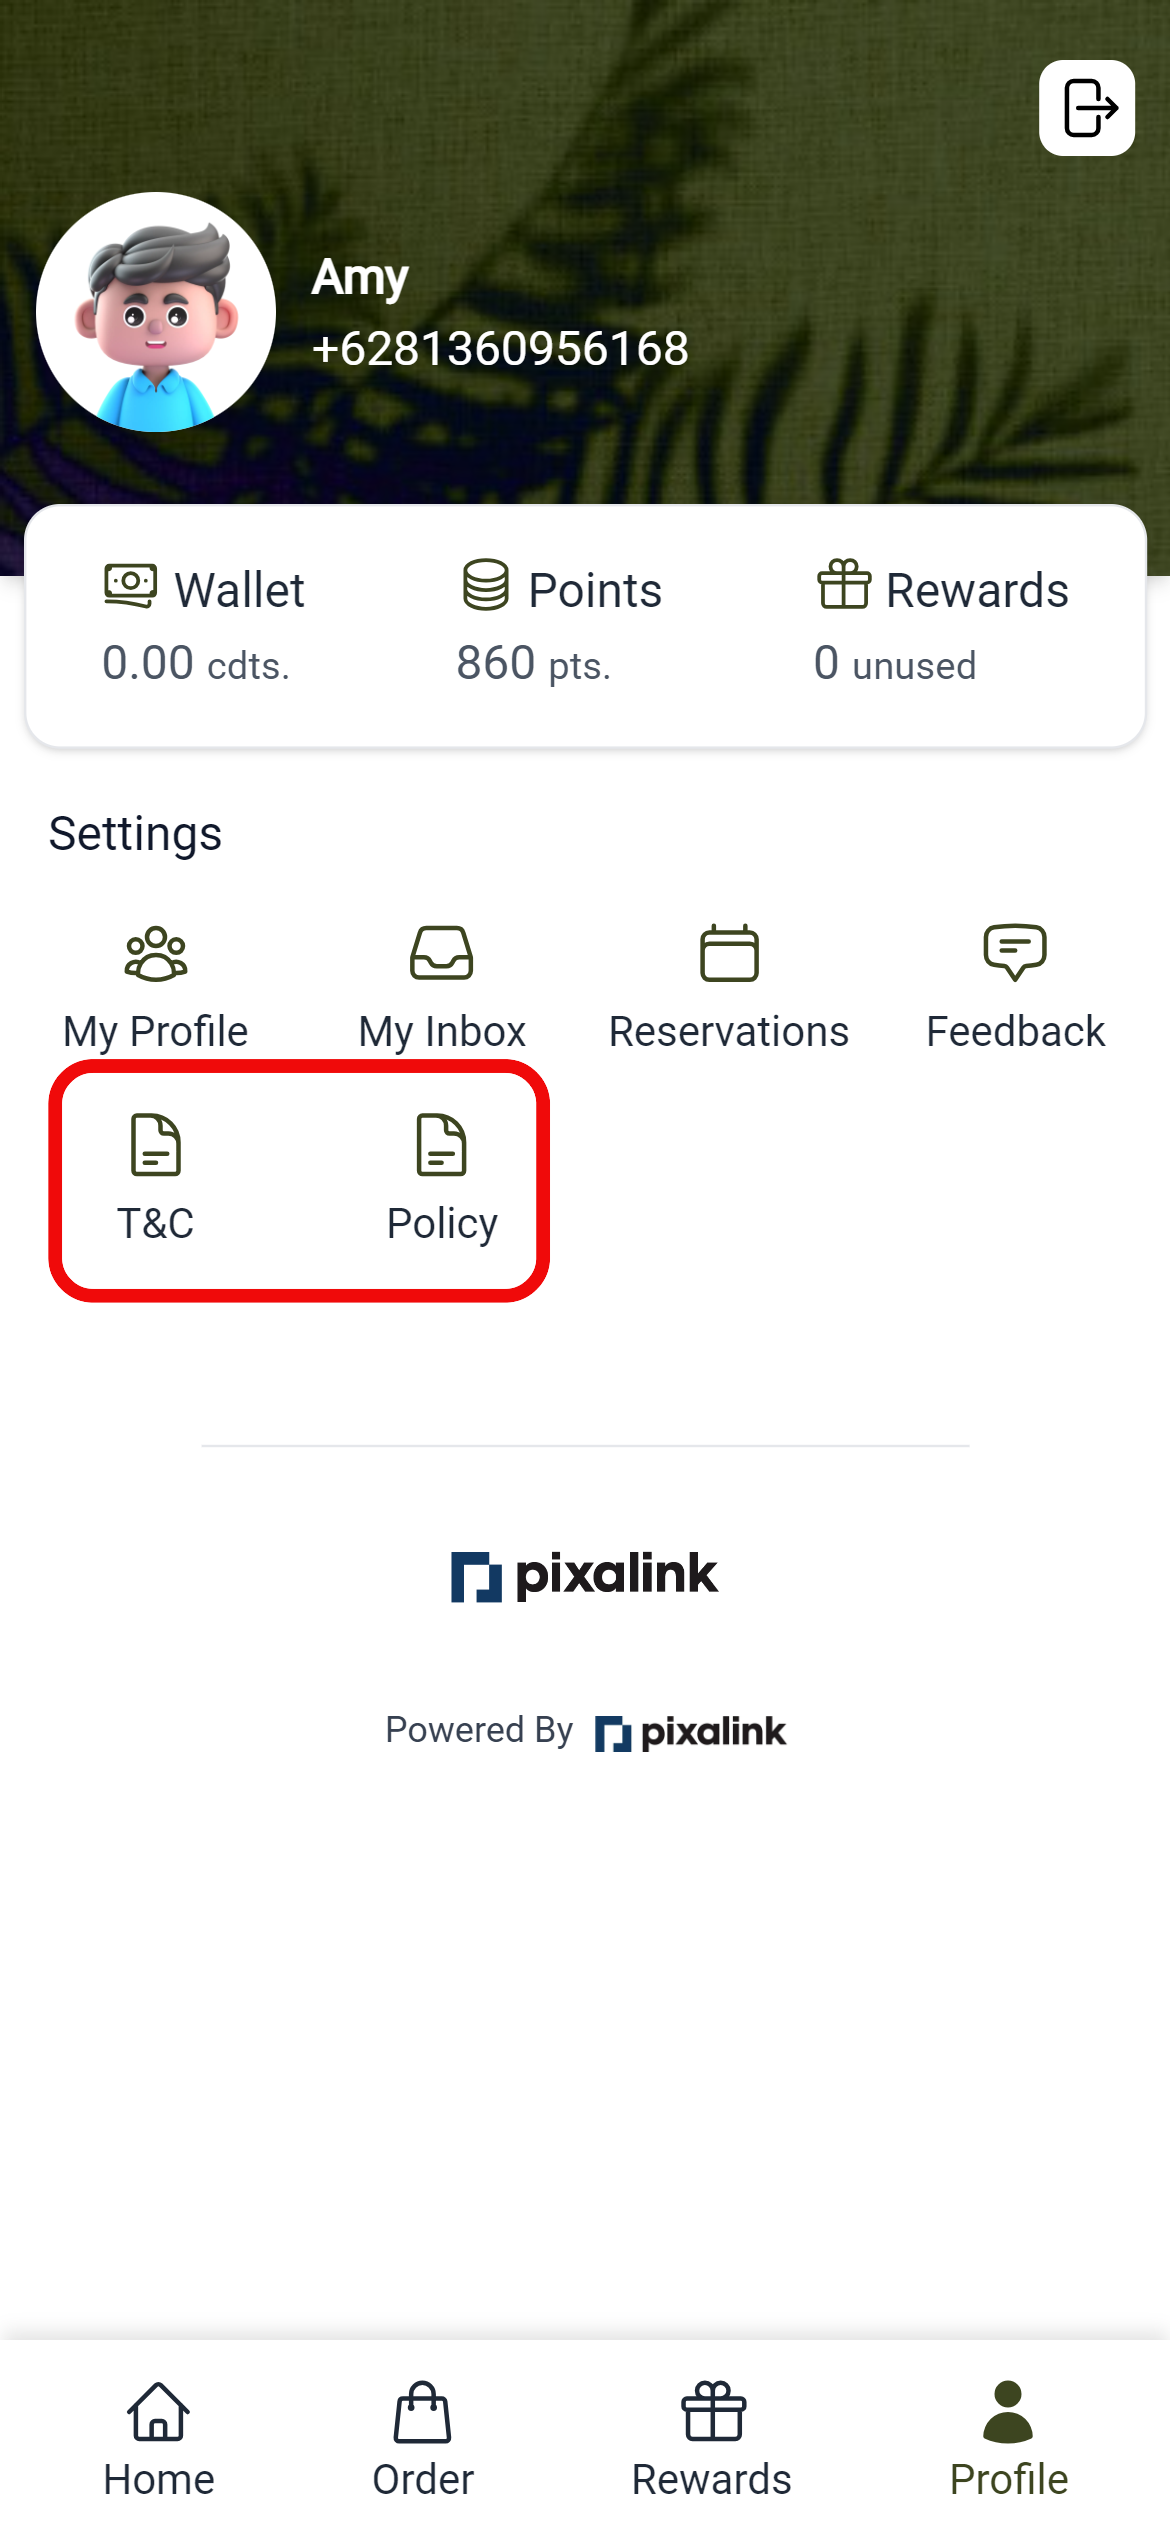
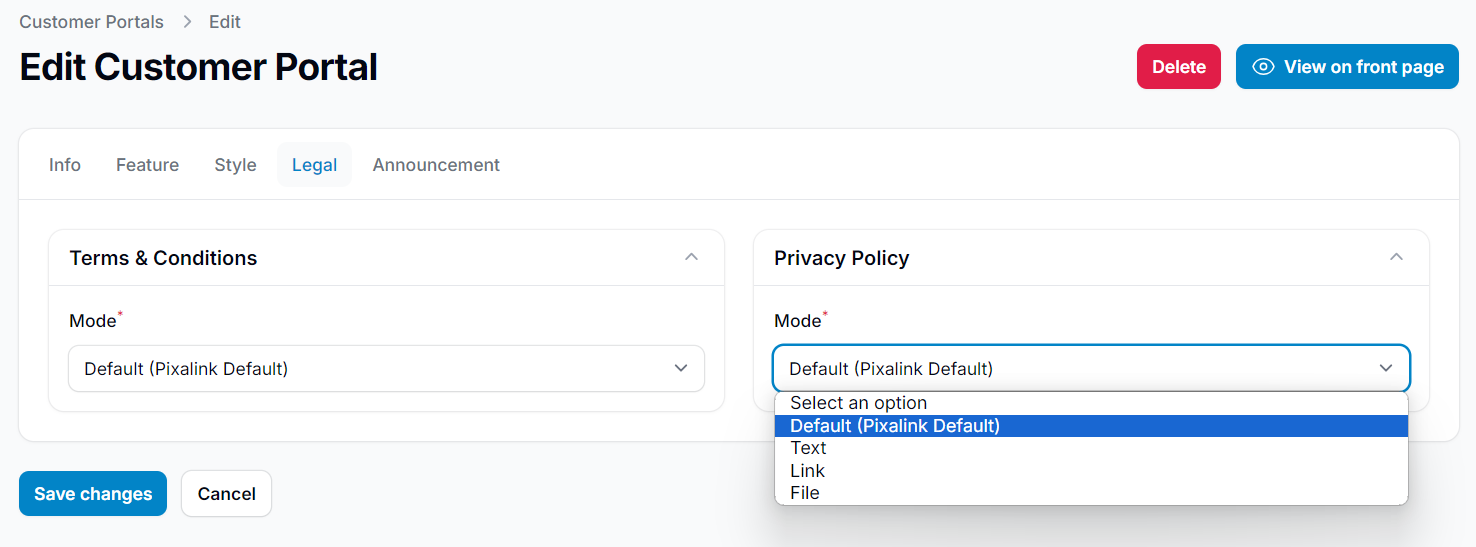
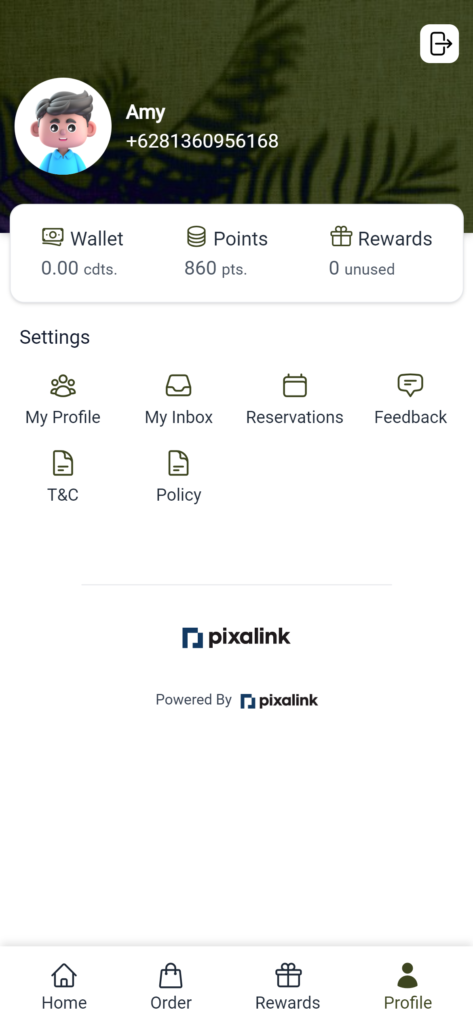
Legal Setting #
The Legal section allows you to customize how your Terms & Conditions and Privacy Policy are displayed to customers. You can choose from the following options:
Default (Pixalink Default)
Redirects customers to the Pixalink website, where pre-written Terms & Conditions and Privacy Policy are provided.
Text
Enter your own content. The Terms & Conditions and Privacy Policy will be displayed directly on the page without redirecting the customer.
Link
Redirects customers to an external URL that you provide—such as your website or a hosted document (e.g., Google Drive).
File
Upload a file (PDF or other formats) for customers to download and review.
These options offer flexibility in how you present legal information based on your business’s needs.