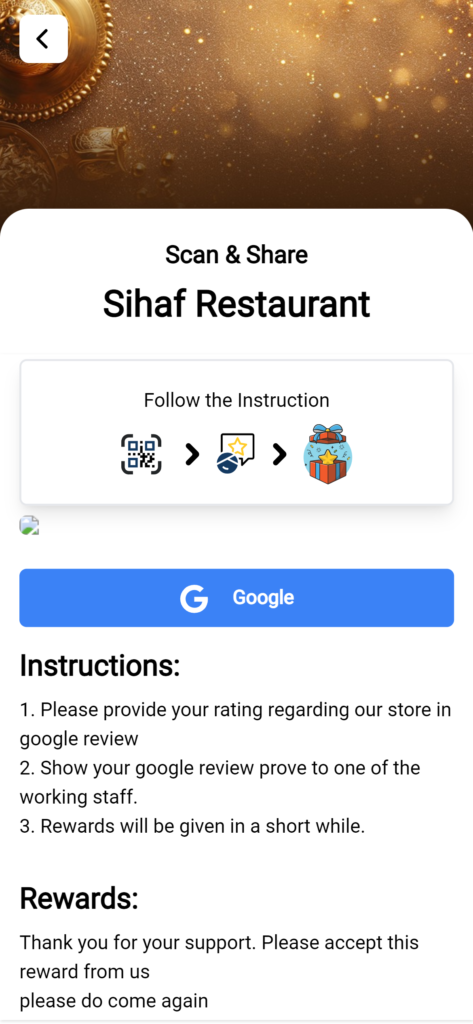
1.0 What Is Scan & QR Reward? #
Scan & QR Reward is a simple way to engage customers by giving them rewards for helping promote your business.
Customers can earn rewards by doing things like:
- Leaving a positive review on Google or Tripadvisor
- Sharing your posts or tagging your business on Facebook, Instagram, or TikTok
Once they complete the action, they scan a QR code to claim their reward.
- It’s a great way to build loyalty, increase your online visibility, and keep your customers actively involved with your brand.
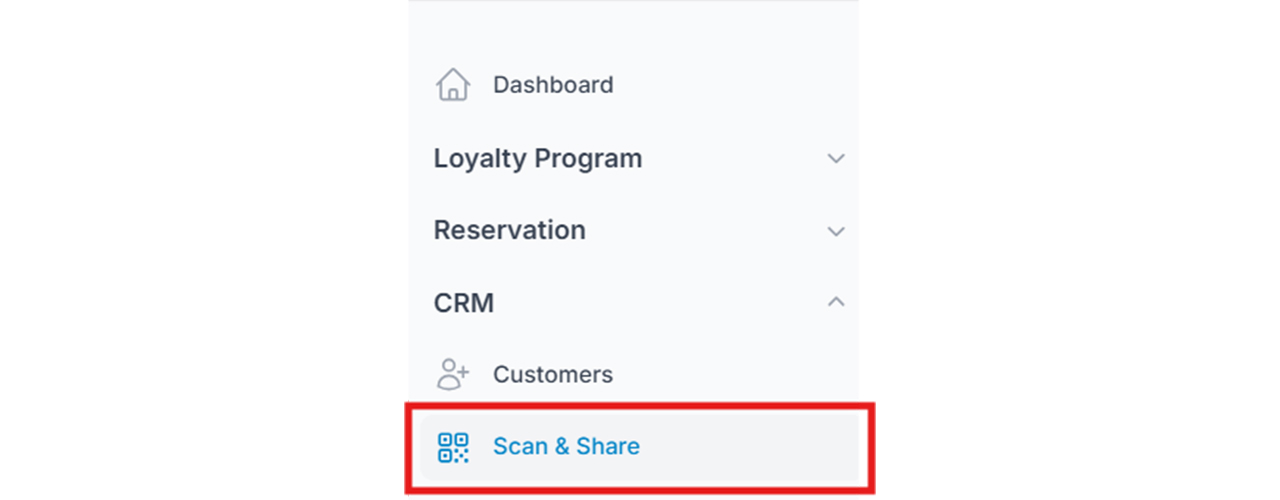
Step 1: Select “Scan & Share” (CRM) from the Dashboard #
From your dashboard, click on “Scan & Share” under the CRM section. This is where you’ll begin setting up your Scan & QR Reward to engage customers through actions like reviews or social media sharing.
Step 2: Click “New Scan & Share” #
On the top-right corner of the page, click “New Scan & Share” to start creating a new reward activity. This allows you to define the task customers must complete to earn their reward

Step 3: Fill in the QR Reward Details #
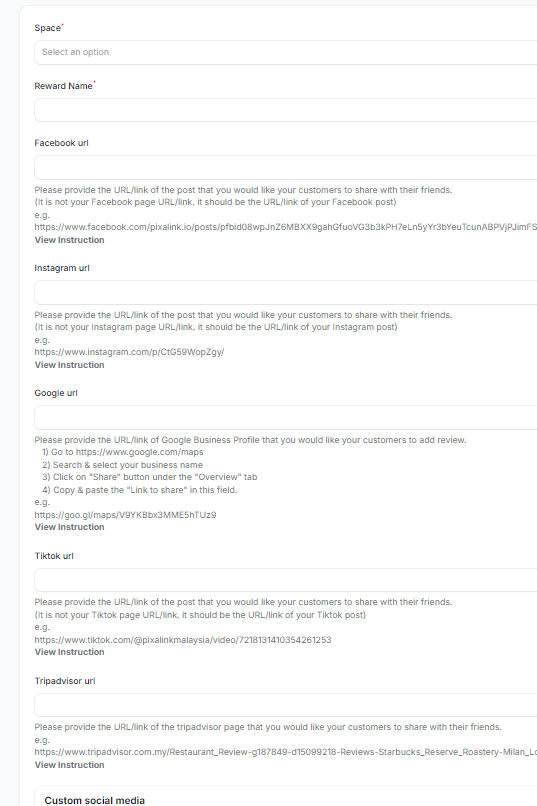
Enter all required information for your QR Reward
2.0 Field Descriptions #
- Space:
The location or group under which the QR Reward is created. Useful if managing multiple outlets or branches. - Reward Name:
The title of the QR Reward (e.g., “Share on Instagram” or “Leave a Google Review”). - Facebook URL:
Paste the direct link to the Facebook post you want customers to share. - Instagram URL:
Provide the link to the specific Instagram post for customers to engage with. - Google URL:
Add the link to your Google Business Profile where customers can leave a review. - TikTok URL:
Insert the link to the TikTok video or profile customers should interact with. - Tripadvisor URL:
Enter your business’s Tripadvisor profile link for customer reviews or sharing.
2.1 Additional Fields #
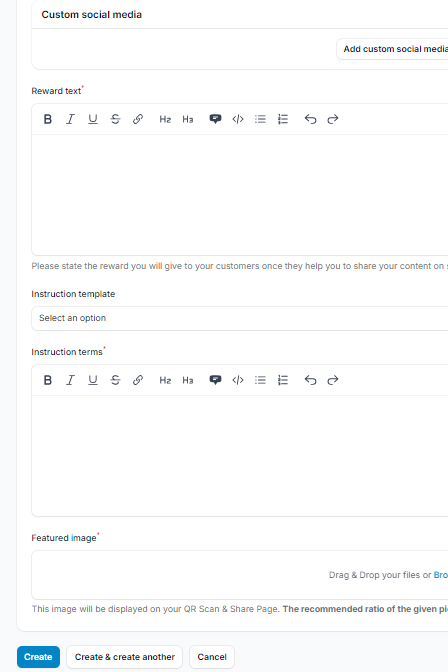
- Reward Text
A brief description of what the customer will receive for completing the task (e.g., “Get 50 points for leaving a review”). - Instruction Template
A pre-filled template that provides standard instructions and terms. This helps you save time and maintain consistency. - Instruction Terms
The specific steps and conditions customers must follow to complete the task and claim the reward.
Note: Using the instruction template is optional. You can edit or customize the instructions and terms based on your campaign needs.

3.0 QR Reward Types (Based on URL Inputs) #
- All Social Media
This option is automatically selected when Facebook, Instagram, Google, and TikTok URLs are all provided. It rewards customers for completing actions across all listed platforms. - Post Share
Activated when one or more Facebook, Instagram, or TikTok URLs are filled in. Customers are rewarded for sharing or engaging with specific social media posts. - Google Review Only
Used when only the Google URL is provided. This rewards customers specifically for leaving a review on your Google Business Profile.
Step 4: The Reward Will Appear in the List #
Once created, your Scan & QR Reward will appear in the list under the Scan & Share section. From here, you can manage, edit, or download the QR code to display in your store or online.

4.0 Download QR Code #
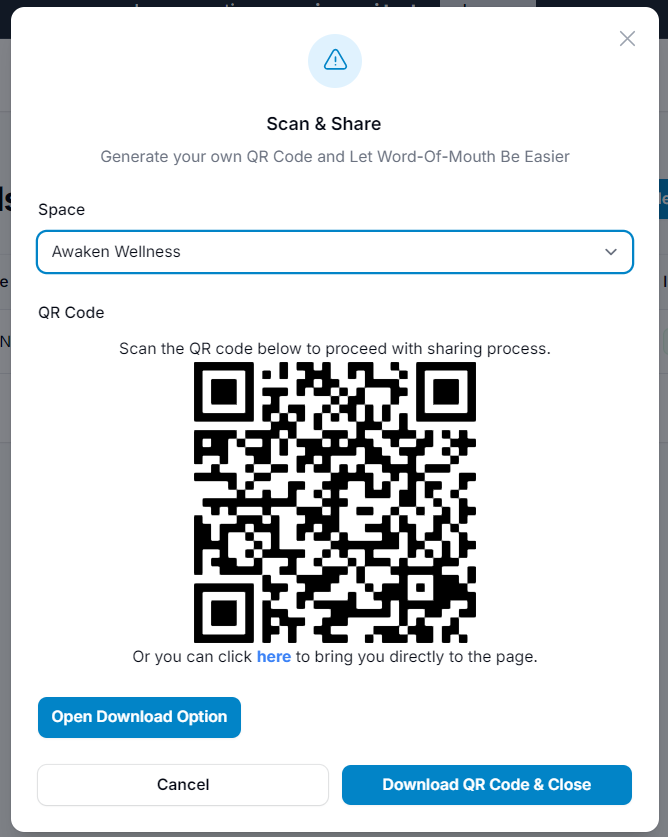
You can download the QR code to let customers scan and access their reward or view the task they need to complete.
How to Download:
- Go to Scan & Share
- Click “Show QR Code” next to the desired reward
- Click “Download” or “Open Download Options”
- Choose your preferred file format (e.g., PNG, SVG, PDF)
Display the QR code at your counter, event booth, or on printed materials to encourage easy access and engagement.
5.0 How To Get Social Media URL #
1. Facebook Post #
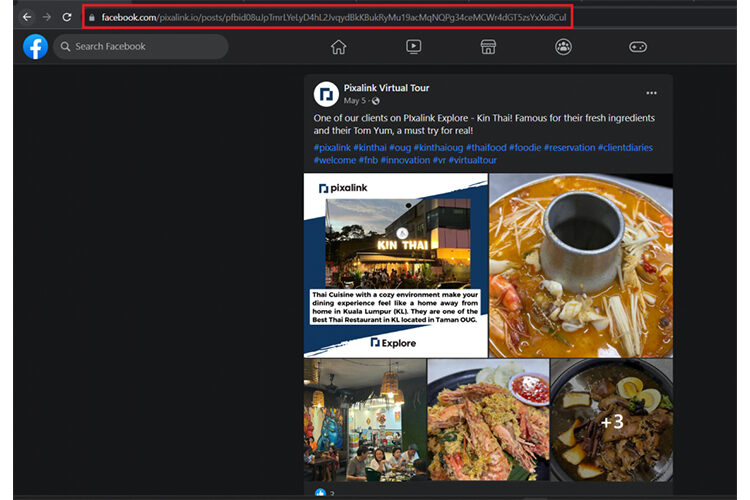
To get the URL of a Facebook post for your Scan & QR Reward:
- Go to your Facebook Page
- Click on the post you want customers to share or engage with
- Copy the URL from your browser’s address bar
Use this link when setting up your reward to direct customers to the correct post.
2. Instagram Post URL #
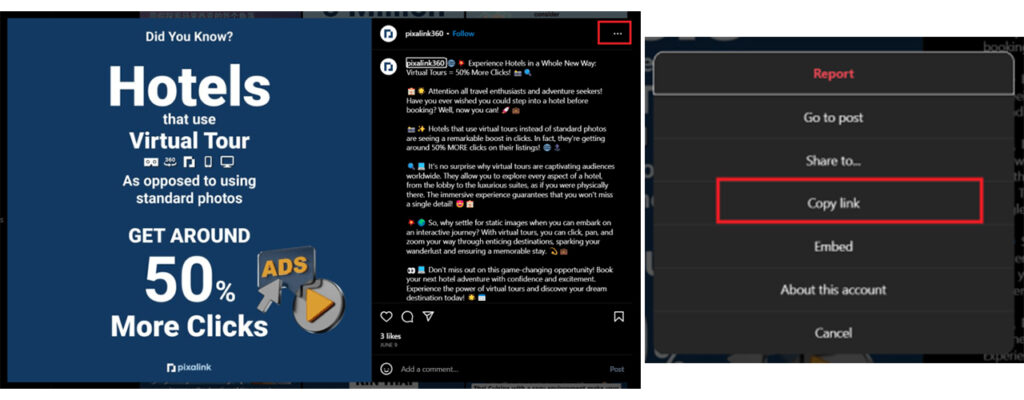
To get the URL of an Instagram post:
- Go to your Instagram profile
- Select the post you want customers to share or engage with
- Tap the three dots (⋯) in the top-right corner of the post
- Select “Copy link”
Paste this link into the setup form for your Scan & QR Reward.
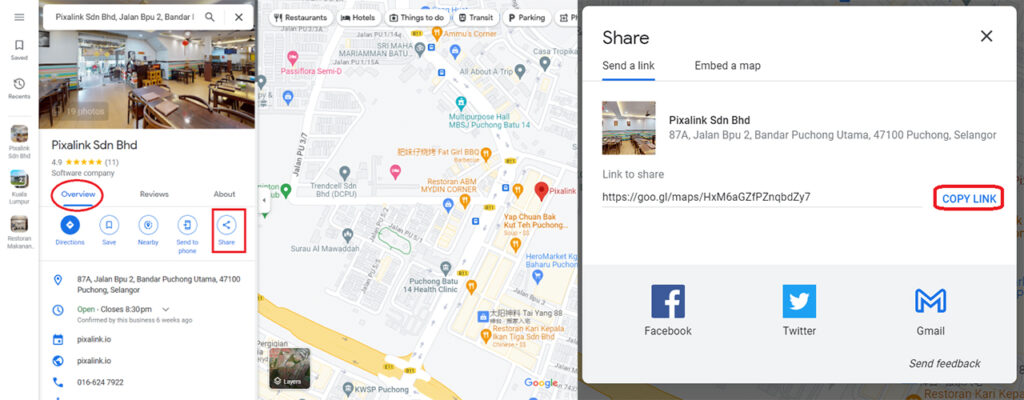
3. Google Review URL #
To get the link to your Google Business profile for reviews:
- Go to Google Maps
- Search for your business name
- On the Overview tab, click the “Share” button
- Click “Copy Link”
Paste this link into the Google URL field when setting up your Scan & QR Reward. This will direct customers to leave a review for your business.
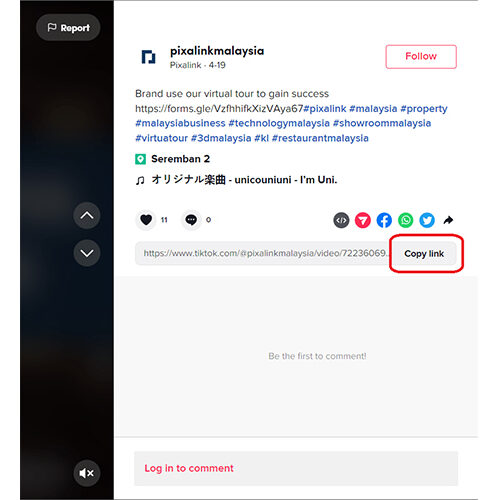
4. TikTok Post URL #
To get the link to a TikTok post for your reward setup:
- Go to your TikTok profile
- Select the post you want customers to share or engage with
- Open the post and tap the “Share” icon
- Tap “Copy link”
Paste this link into the TikTok URL field when setting up your Scan & QR Reward.
